 International
 Singapore
 Malaysia
 Thailand
 Vietnam
Your shopping cart is empty!

Raspberry Pi AI Kit: Custom Object Detection with Hailo8L
- Asri Ruslan
- 27 Aug 2024
- Tutorial
- Advanced
- 509
Introduction
Artificial Intelligence (AI) is becoming more accessible and affordable for learners and developers with hardware like the Raspberry Pi AI Kit. This kit brings the power of AI, including machine learning and computer vision, to the hands of enthusiasts at a budget-friendly price point. With the Raspberry Pi AI Kit, you can build various AI projects without needing expensive infrastructure. However, it is a multi-step process that involves data collection, model training, and deployment.
In this tutorial, we will guide you through setting up a Raspberry Pi AI Kit with a custom YOLOv8s model designed to detect Cytron products, specifically the newly launched Motion 2350 Pro and Maker Pi Pico.
This tutorial will take you through several key processes, including:
- Data Preparation
- Training the YOLOV8 Model
- Model conversion (Pytorch to ONNX to HEF)
- Model Deployment on Raspberry Pi 5 AI Kit.
Dataset Preparation
Data Collection and Labelling Using Roboflow
The first step in creating a custom YOLOv8 model is gathering a dataset that contains images or videos of the object/s you wish to detect. For this tutorial, we’ll use Roboflow for data collection and labeling. Roboflow simplifies the process of dataset management and also provides tools for automatic data augmentation.
Step-by-Step Guide:
- Collect Images: Capture images or videos of the subject you want to detect from various angles, lighting conditions, and backgrounds to create a robust dataset.
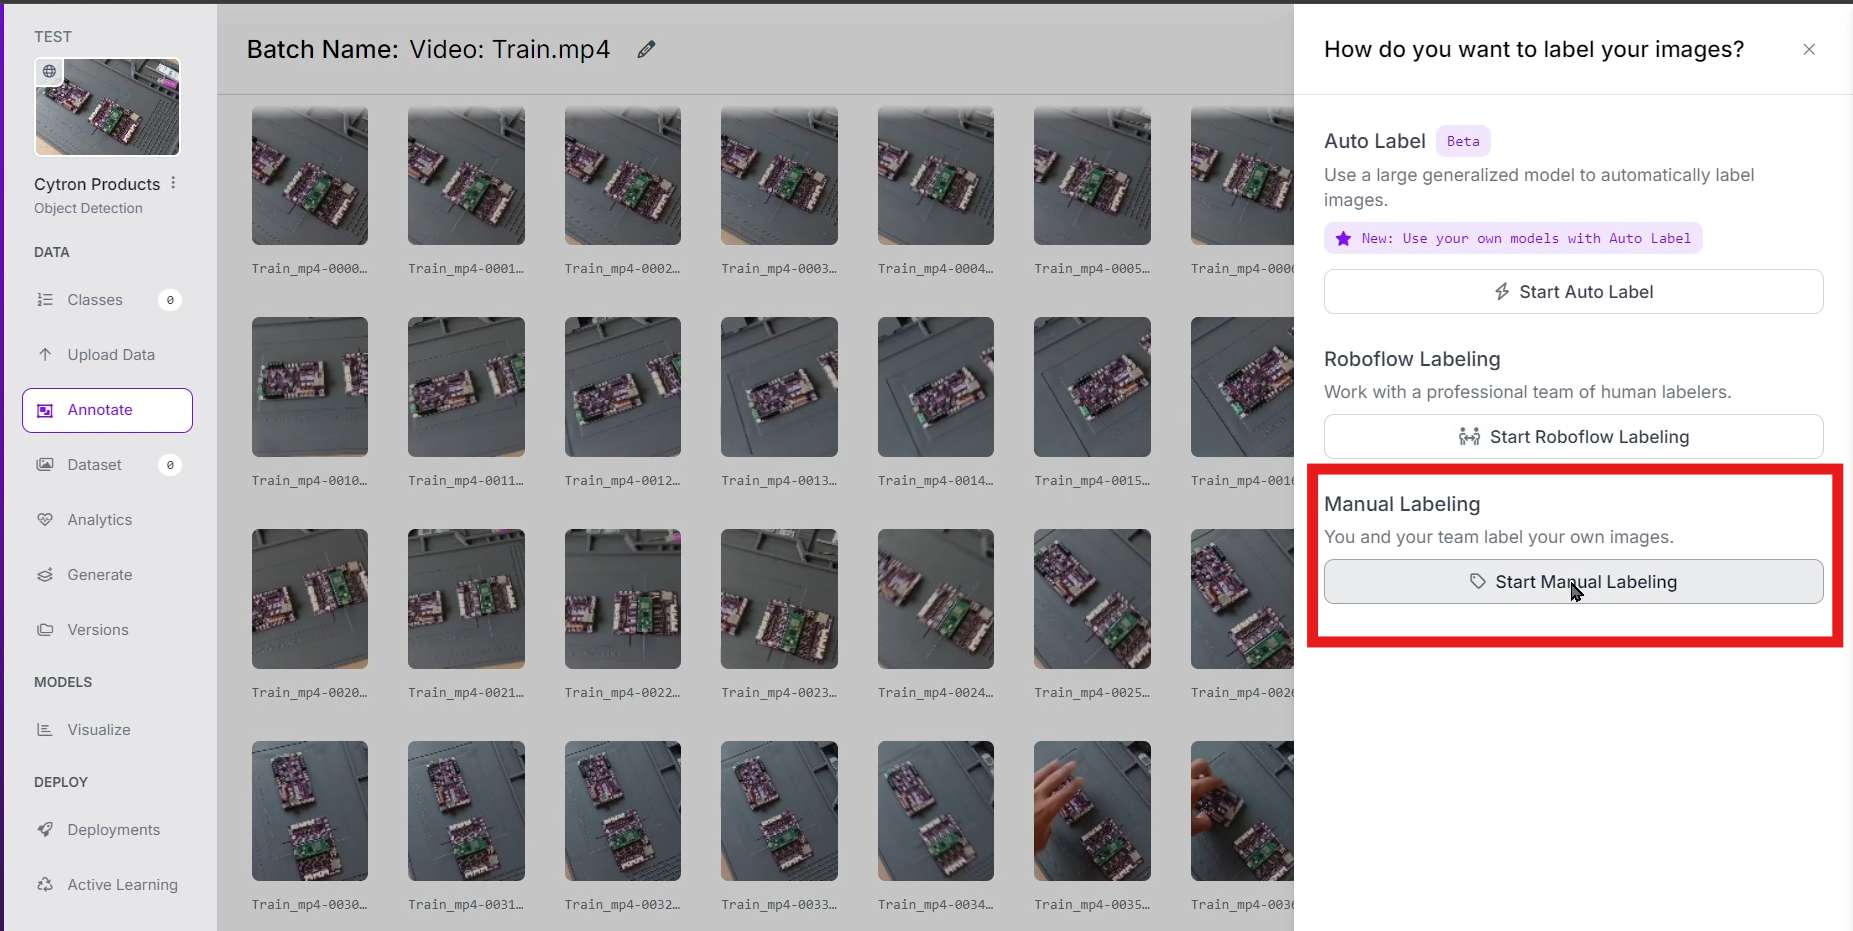
- Sign Up on Roboflow: Create a free account on Roboflow.
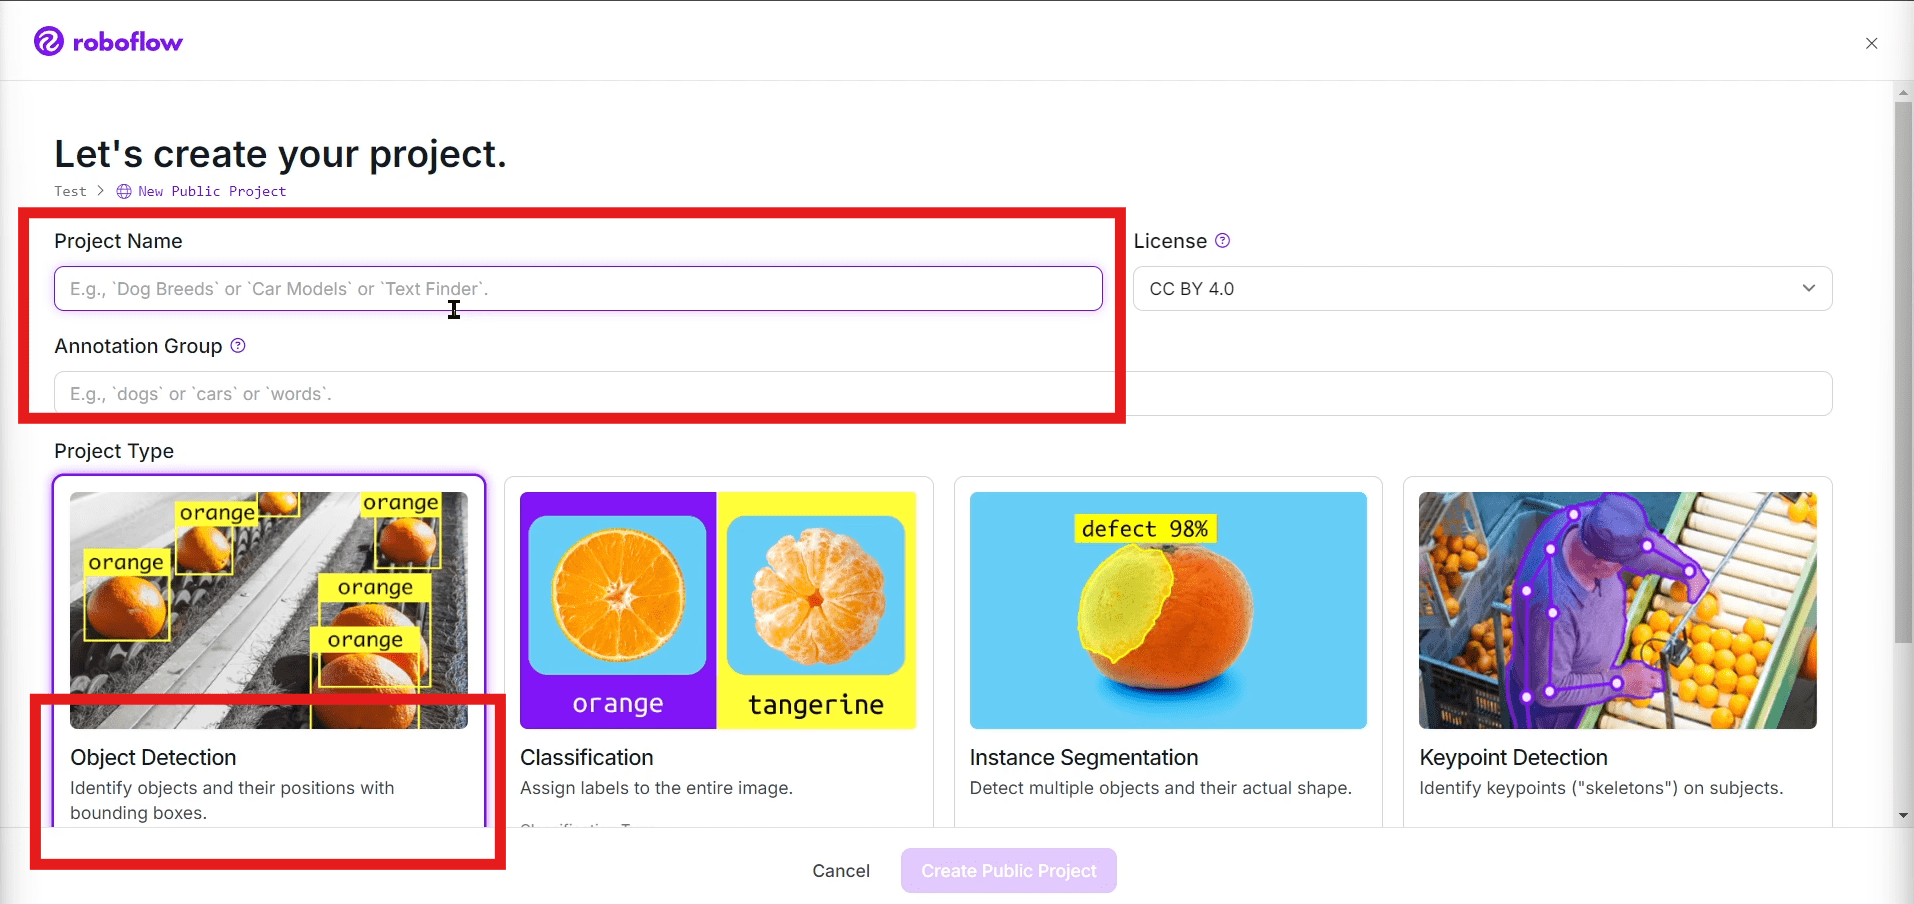
- Create a New Project: Within Roboflow, start a new project for object detection.

- Name your project and annotation, choose project type (object detection) then click create public project.
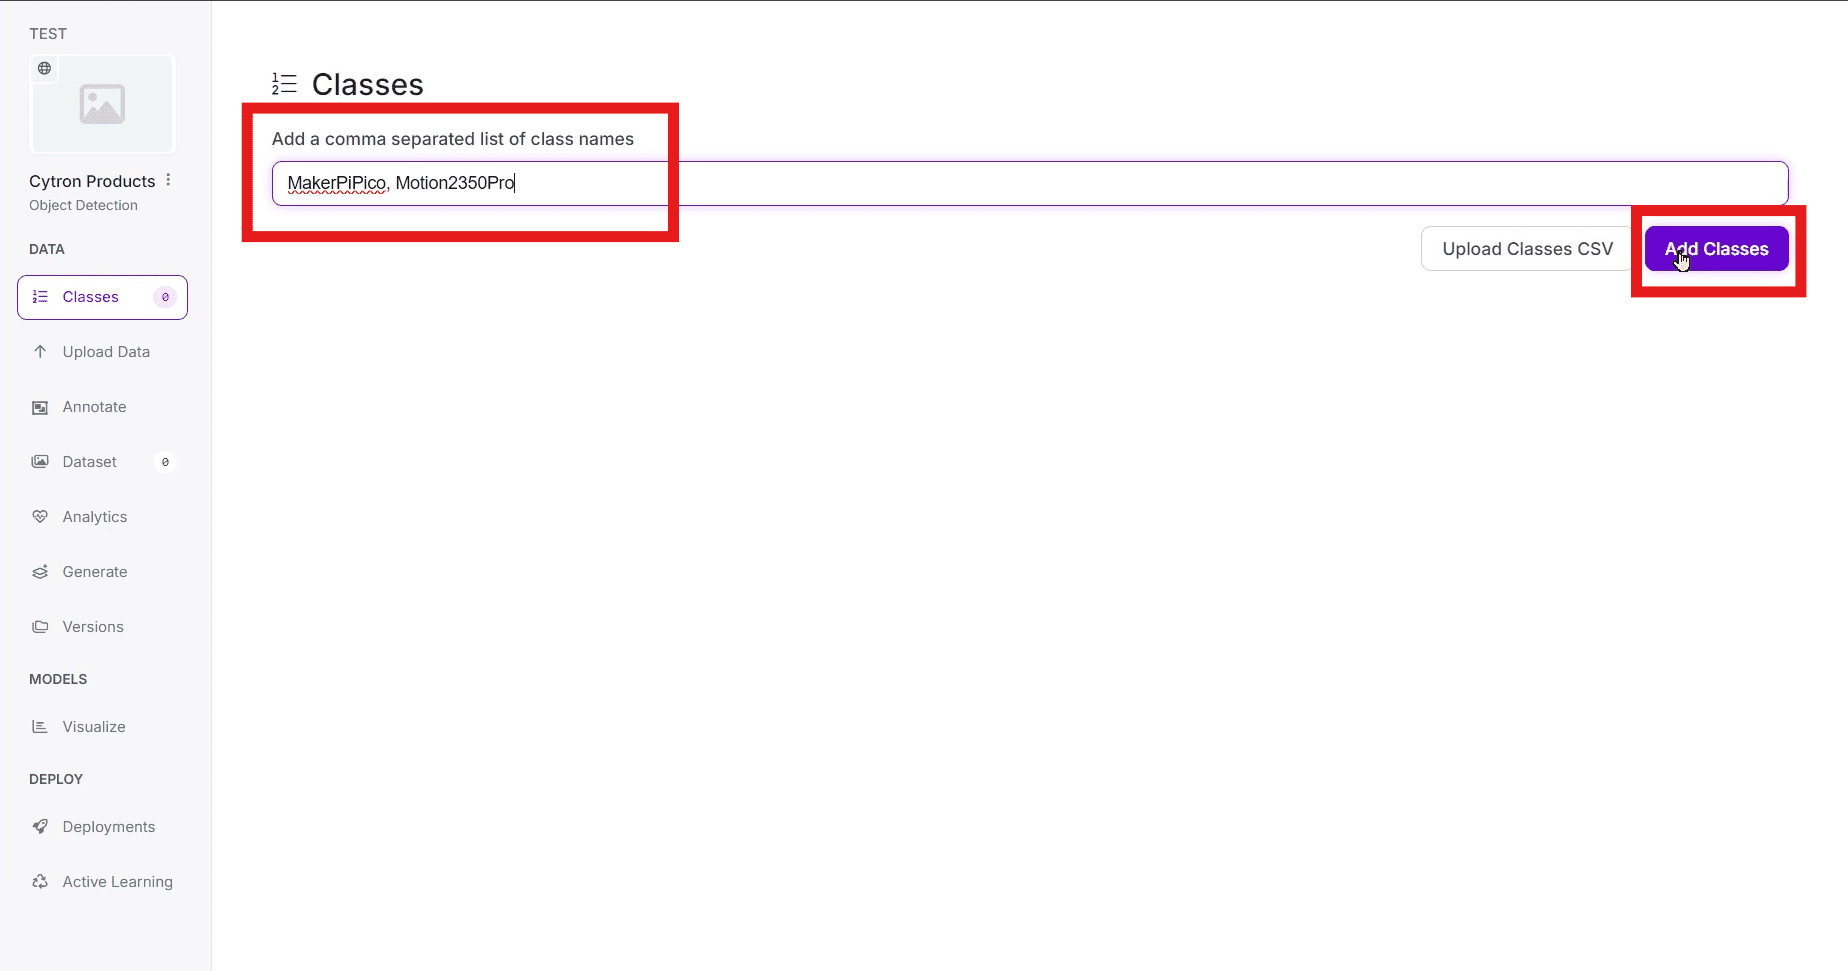
- Go to classes tab and create your list of class names then add classes.
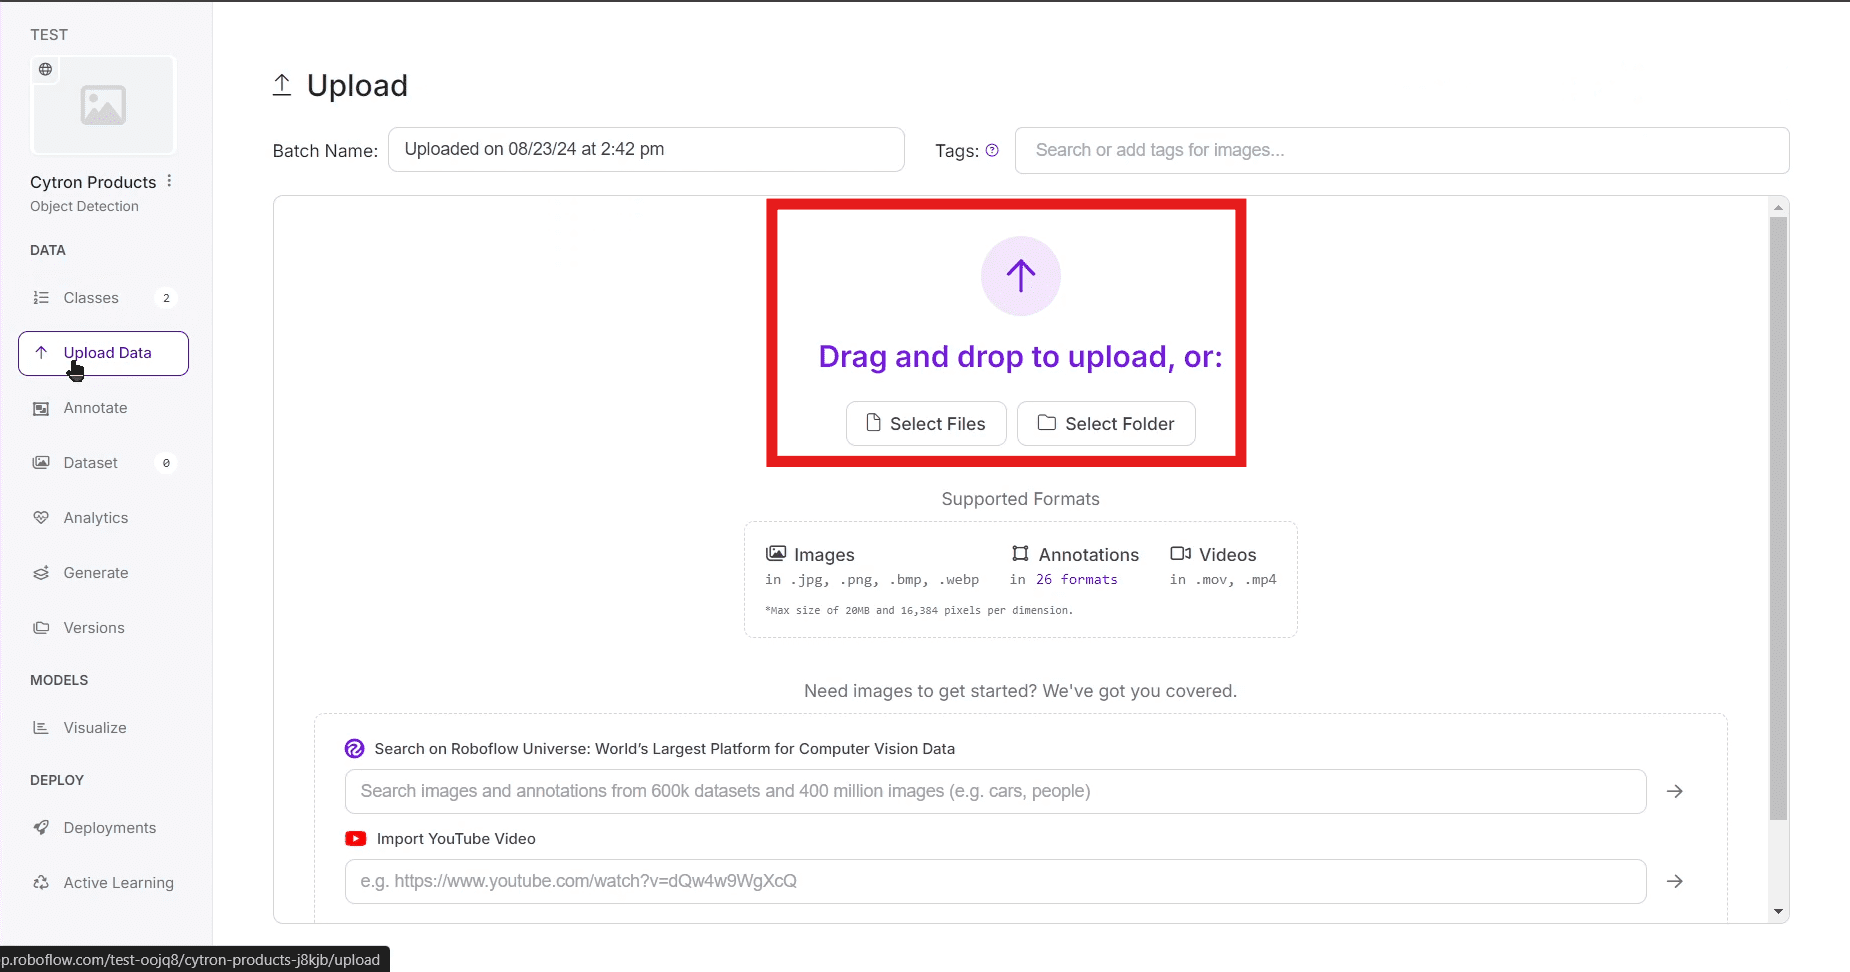
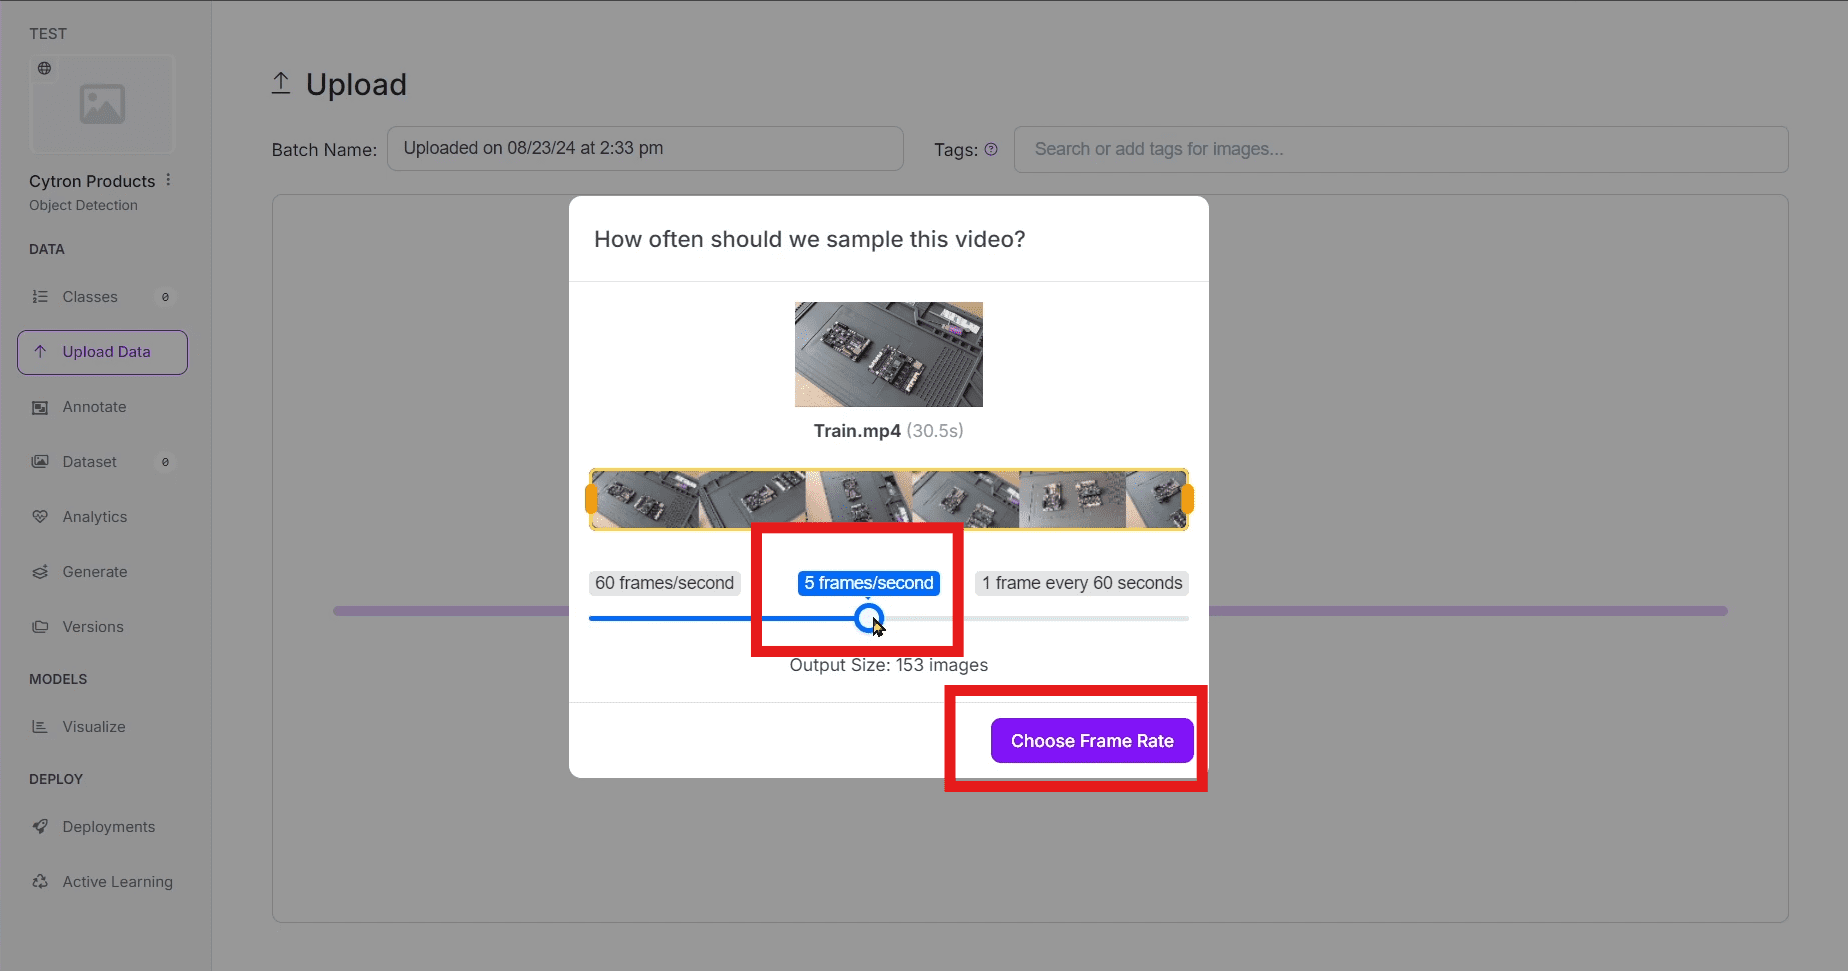
- Upload Images or videos: For this tutorial we will use a video then extracted the images from the video as our dataset.
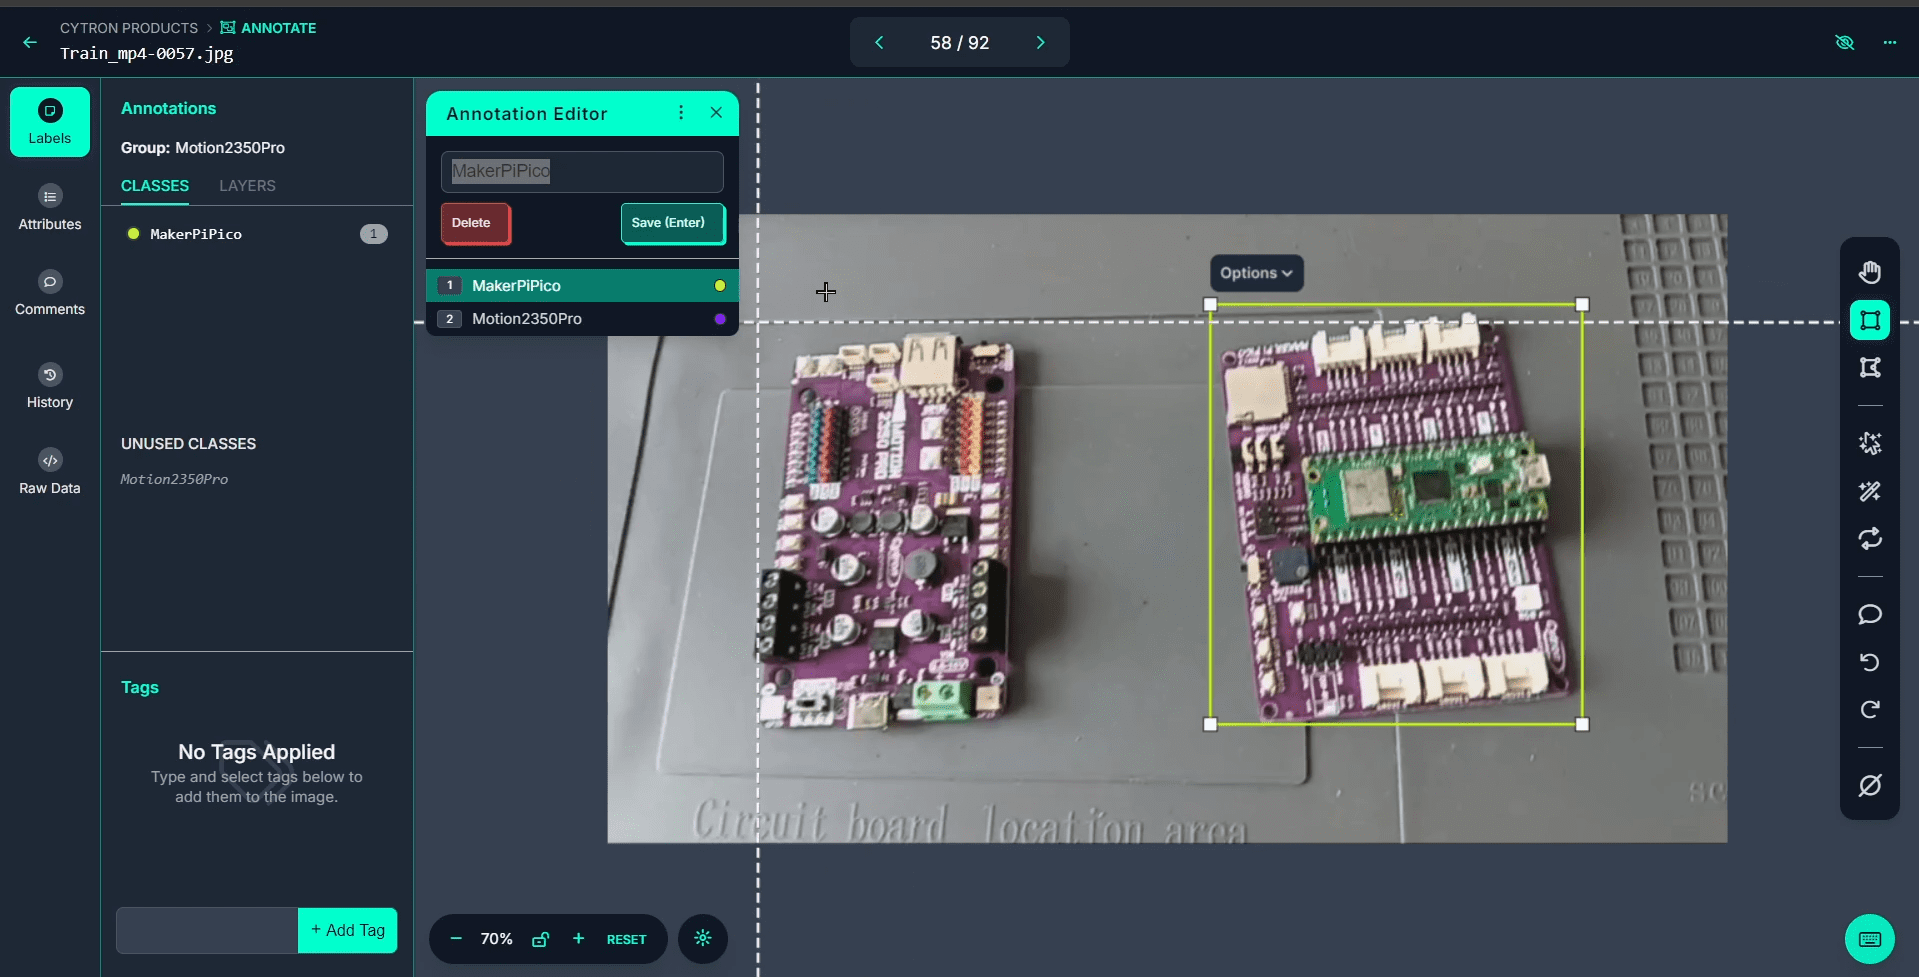
- Label Images: Use Roboflow’s labeling interface to draw bounding boxes around the objects. Ensure accuracy by adhering to best labeling practices:
- Best Practices: Keep the bounding box tight but not too close; avoid occlusion (when possible); balance the dataset with diverse angles and sizes; and ensure no overfitting by not repeating the same image too many times.
- Add images to dataset: Ensure all the images has been annotated in the progress tab.
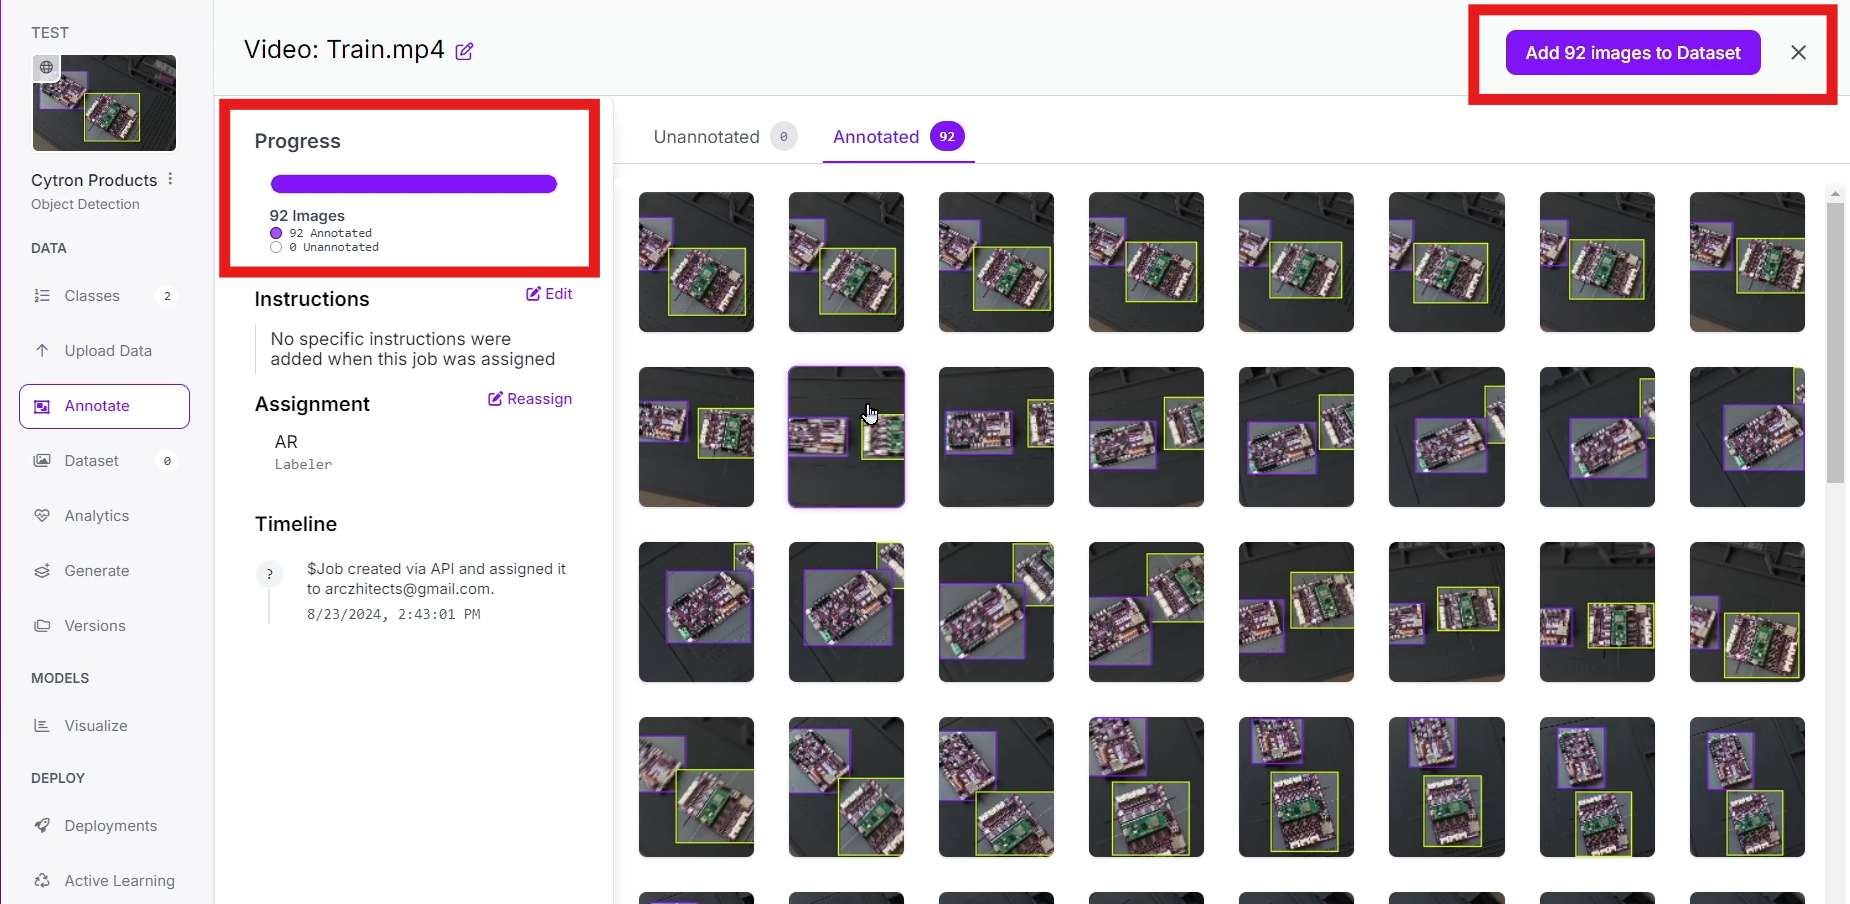
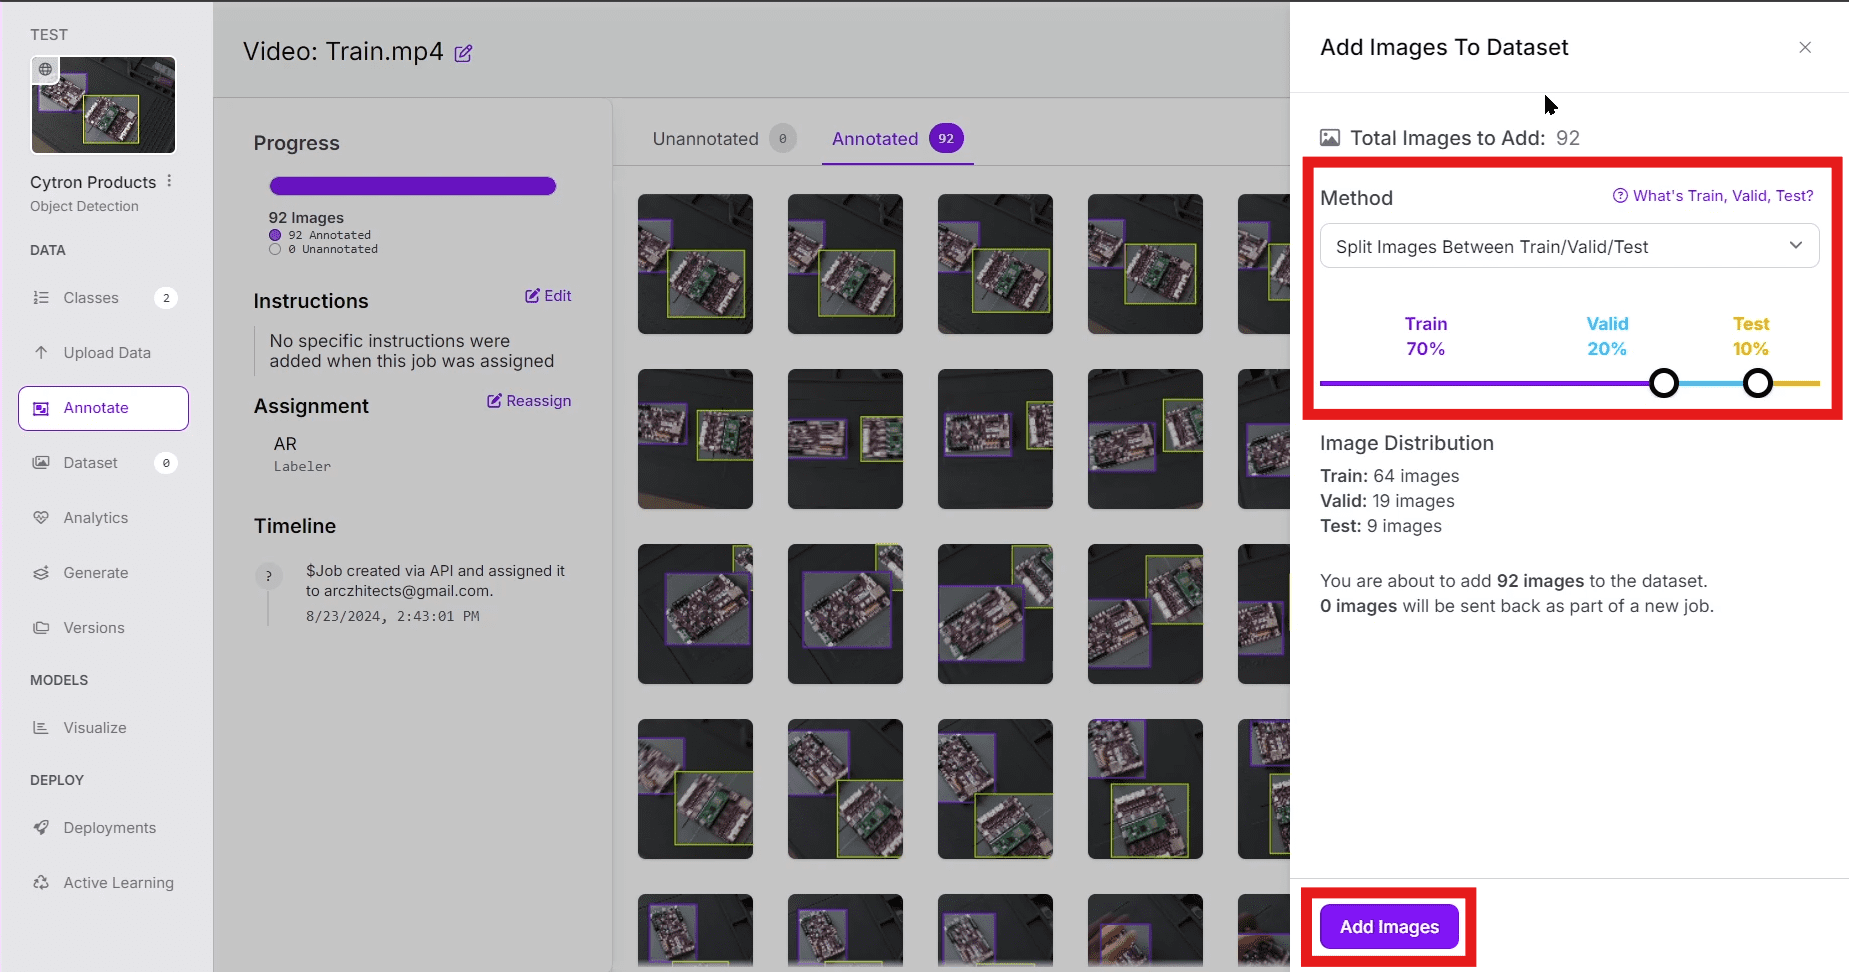
- Split images accordingly
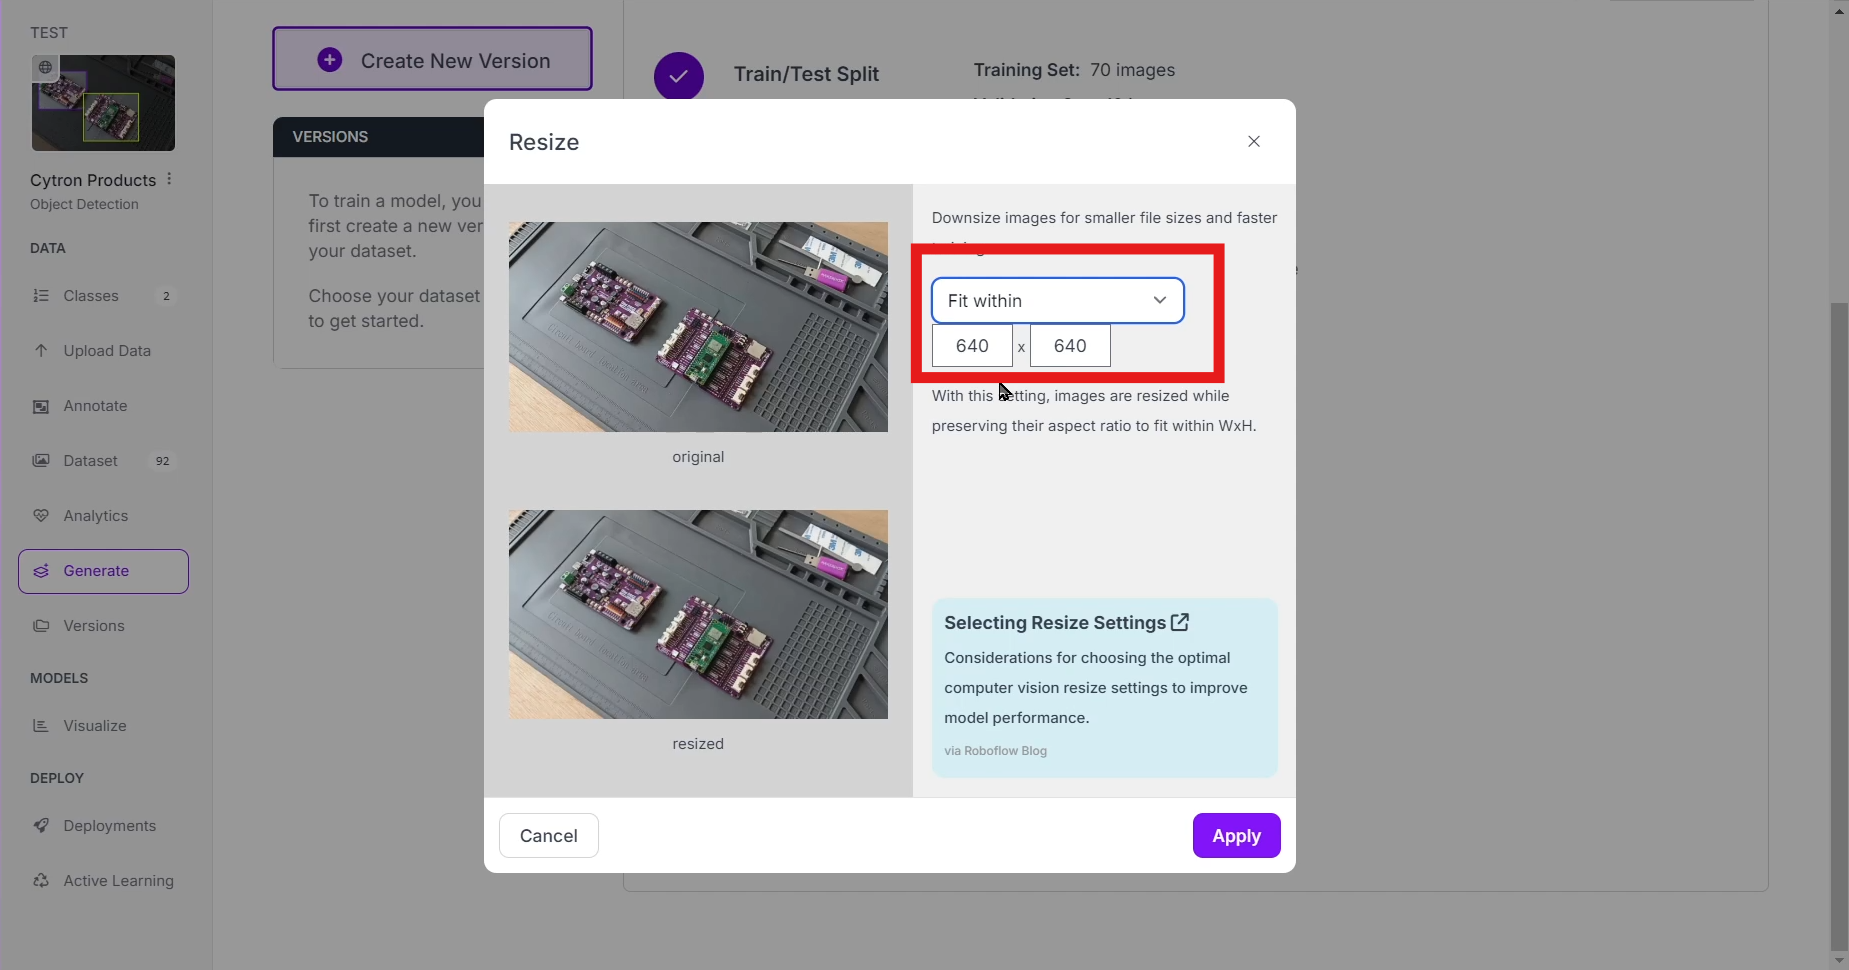
- Add pre-processing: Here we going to resize the images to 640x640 and add other optional augmentation accordingly.
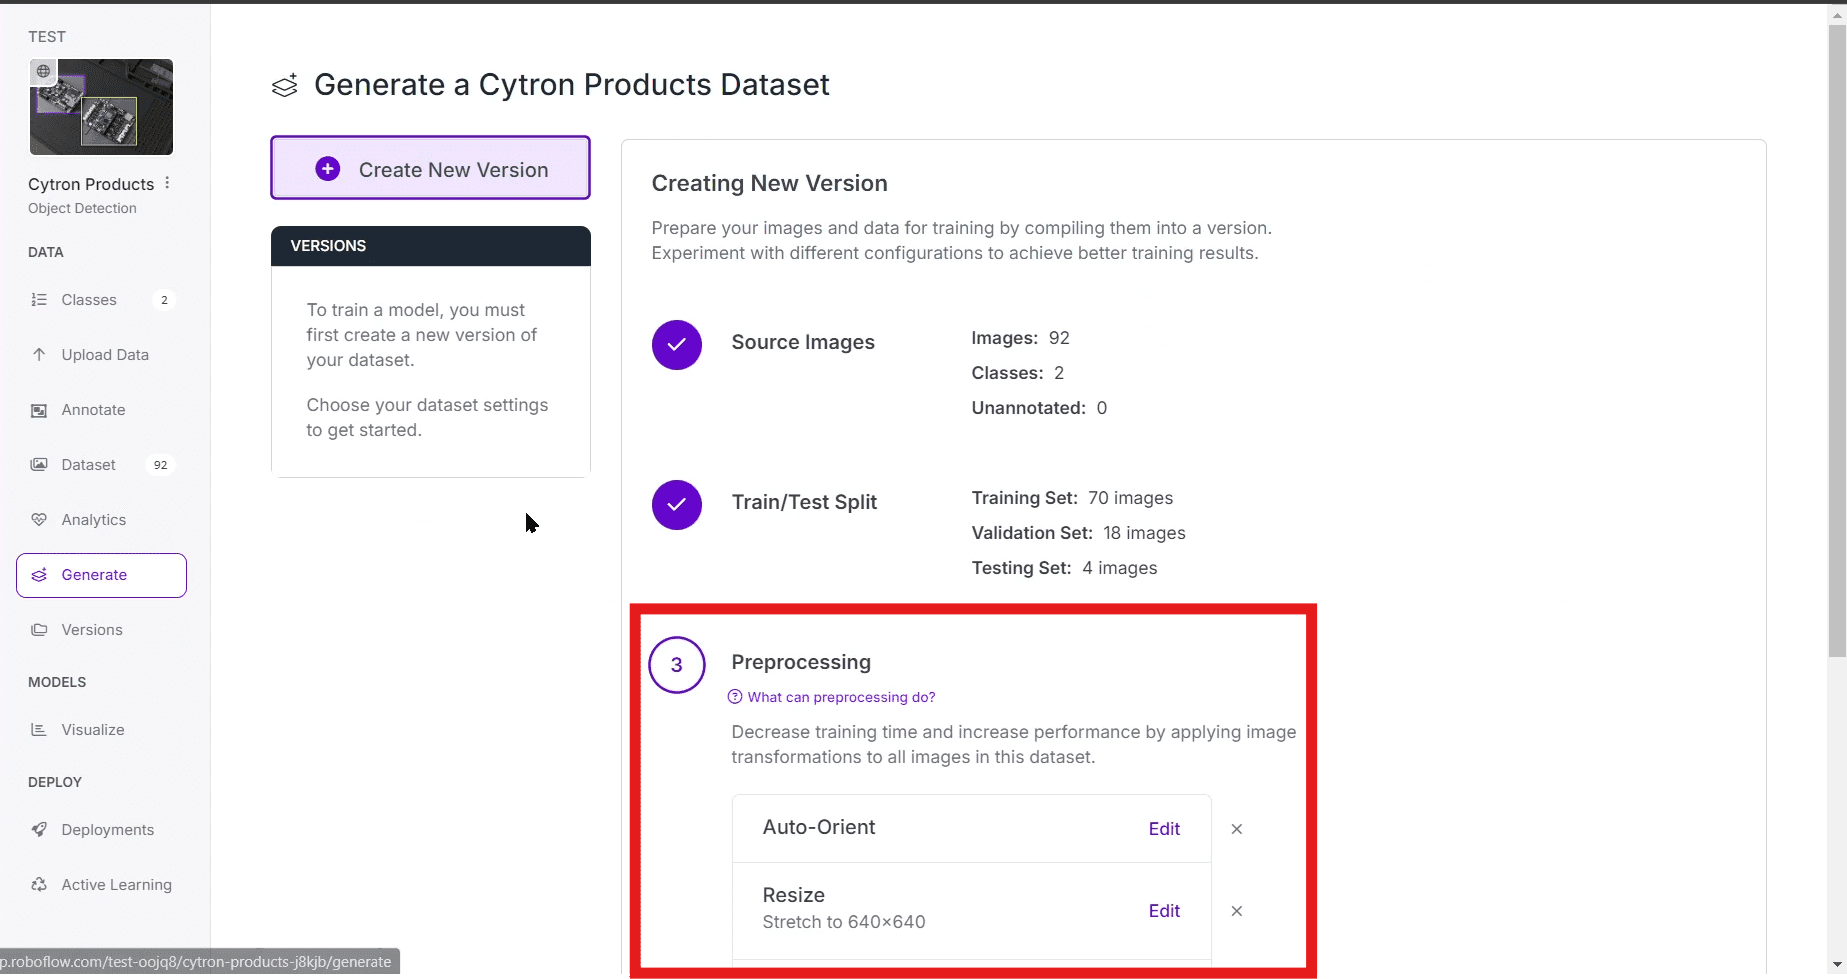
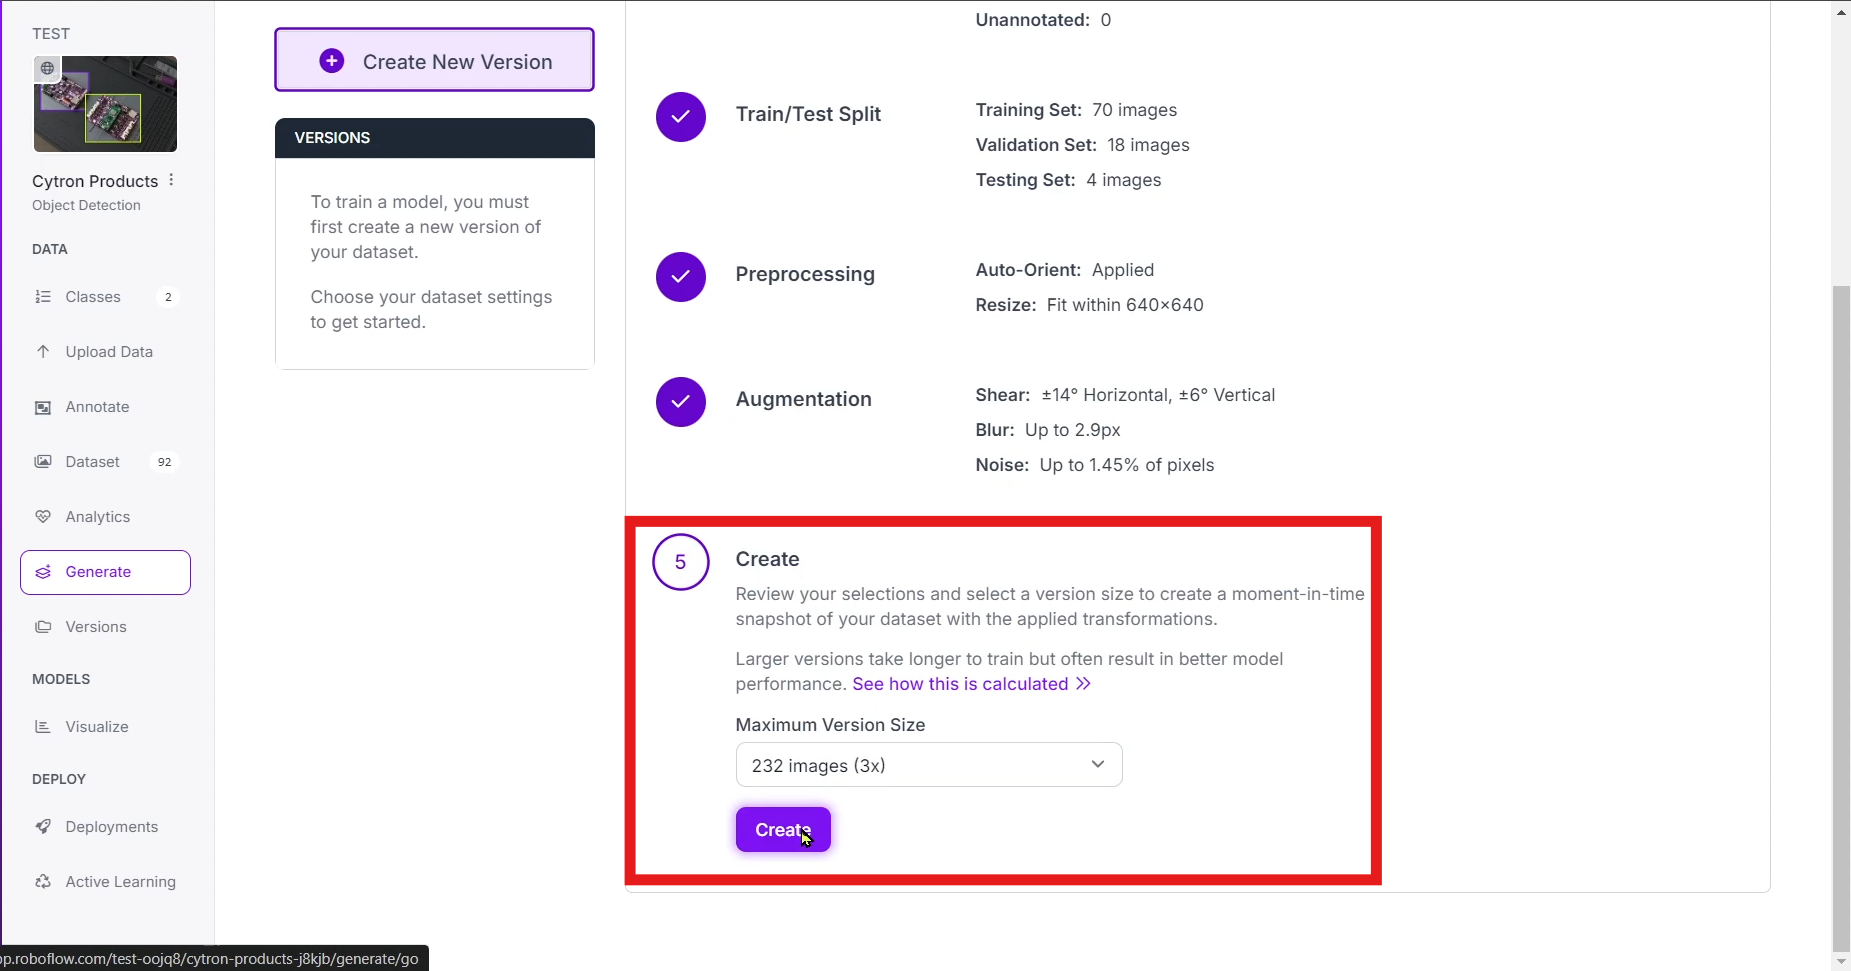
- Create the dataset:
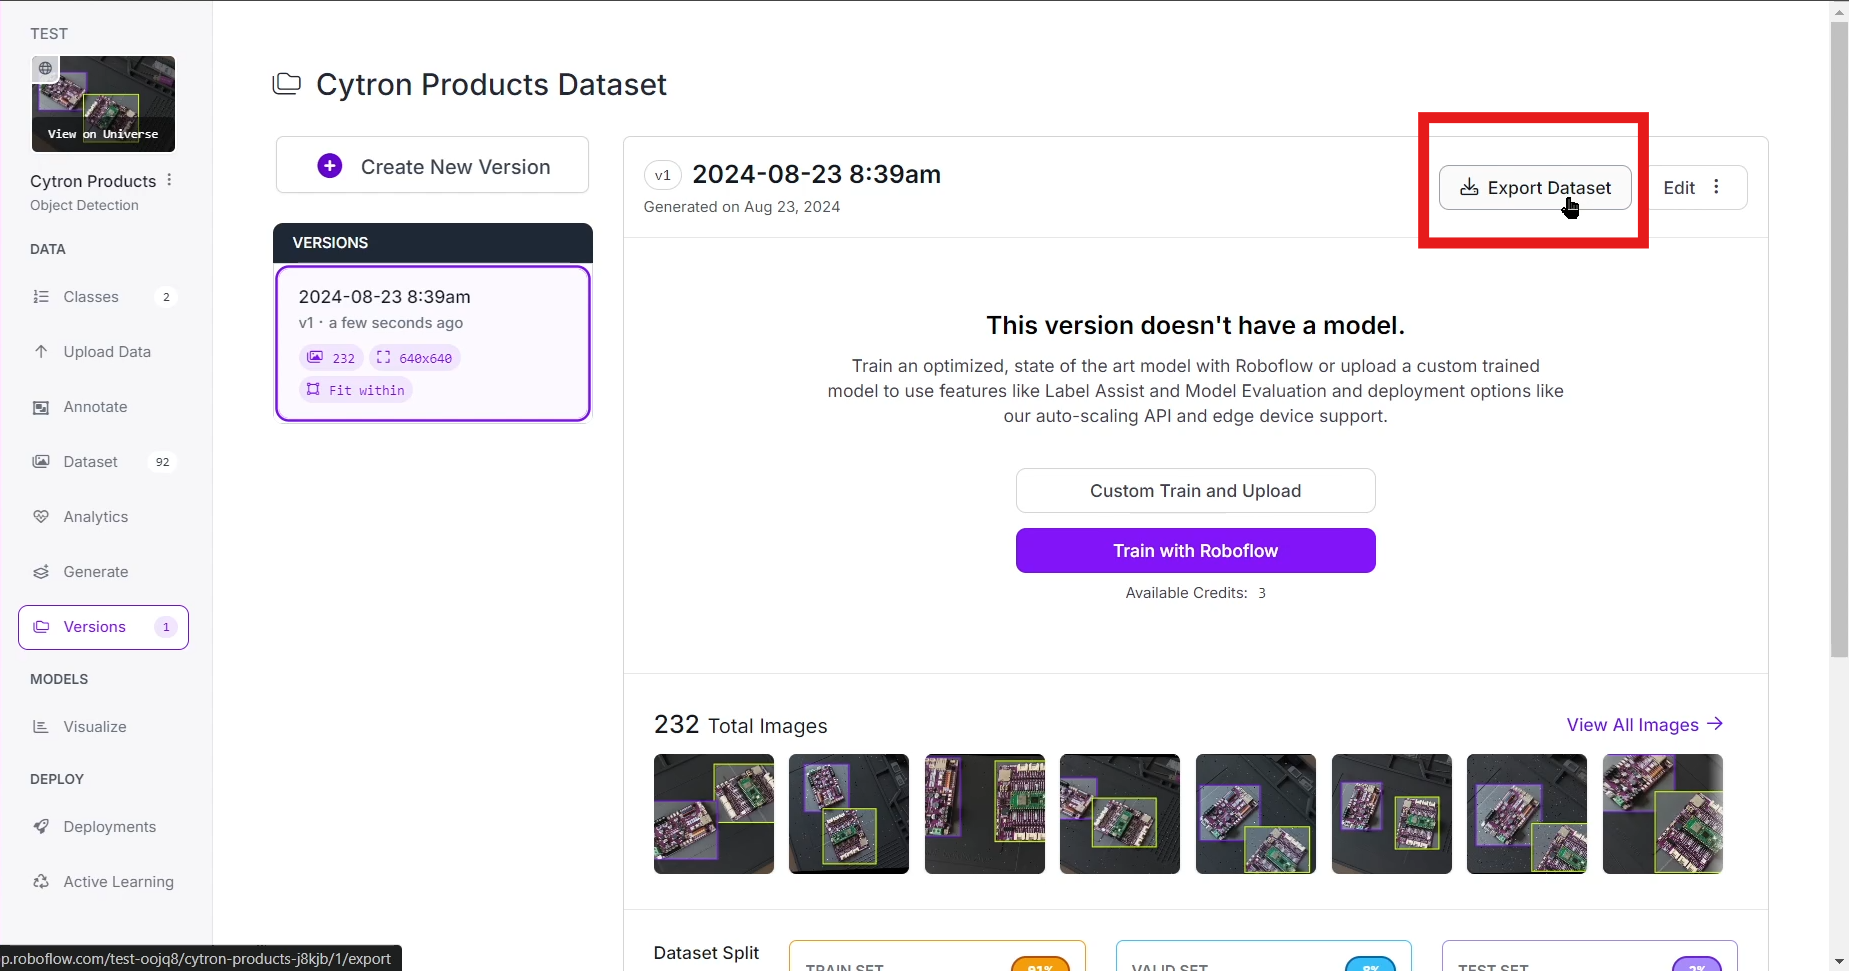
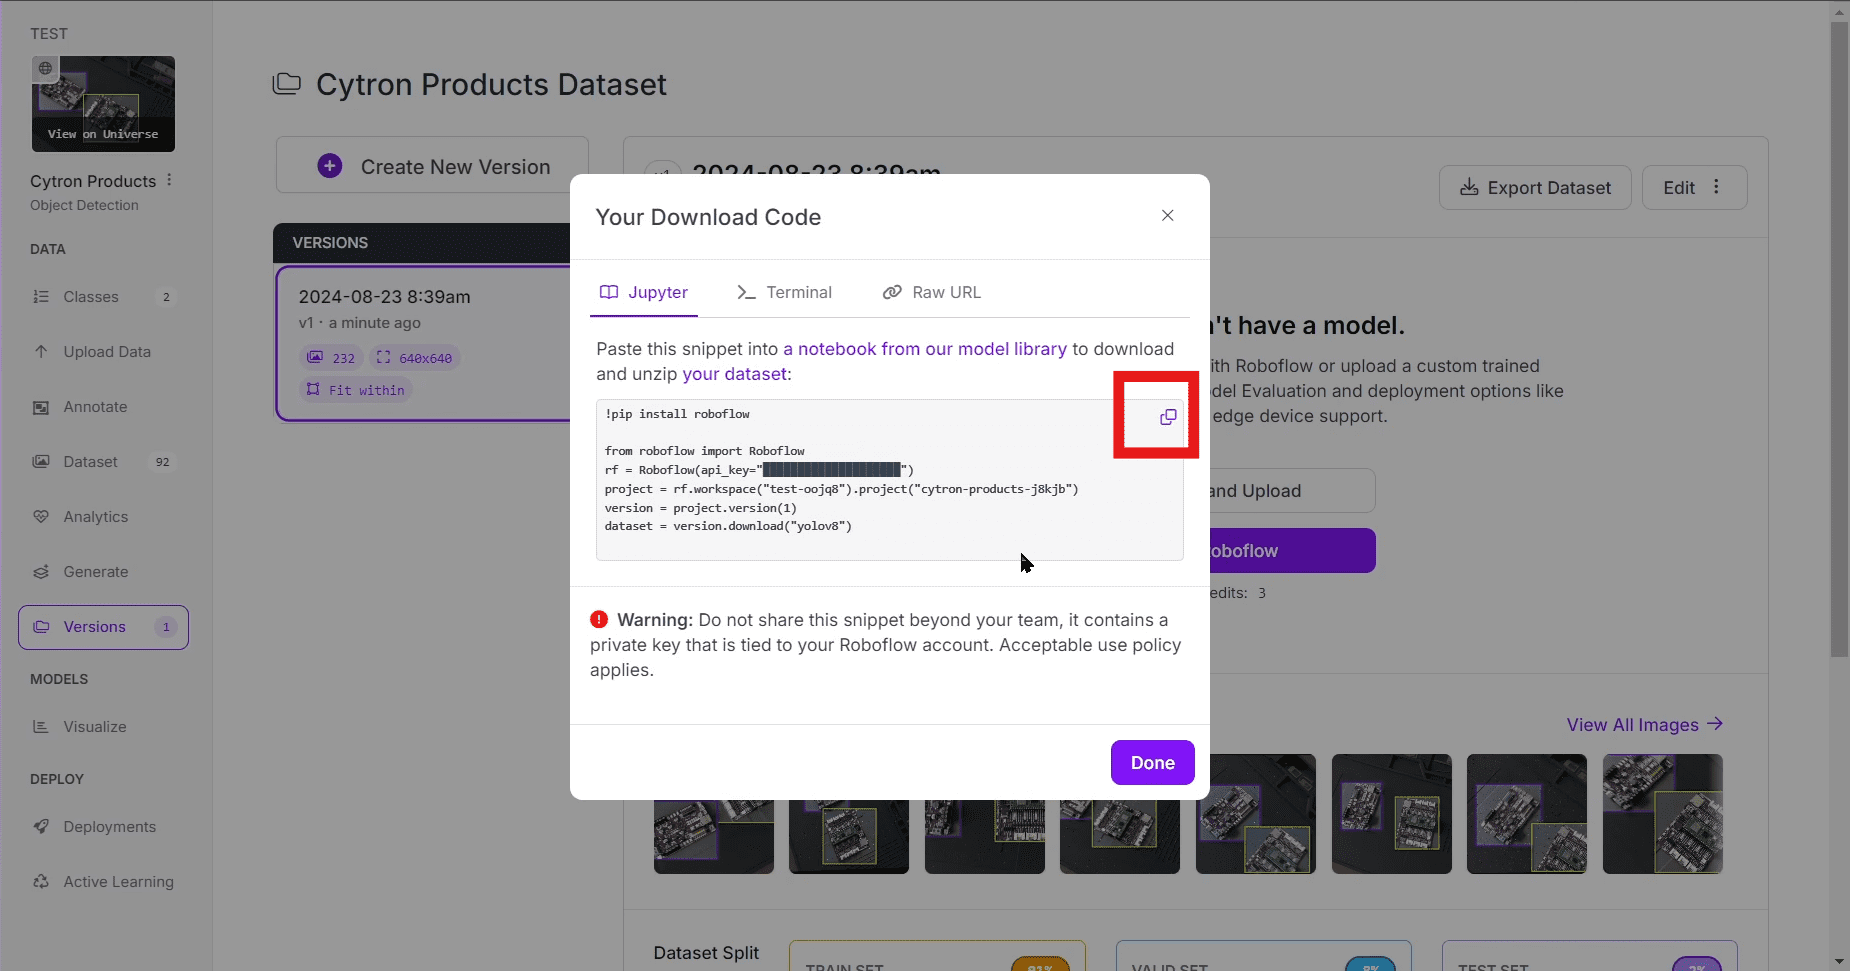
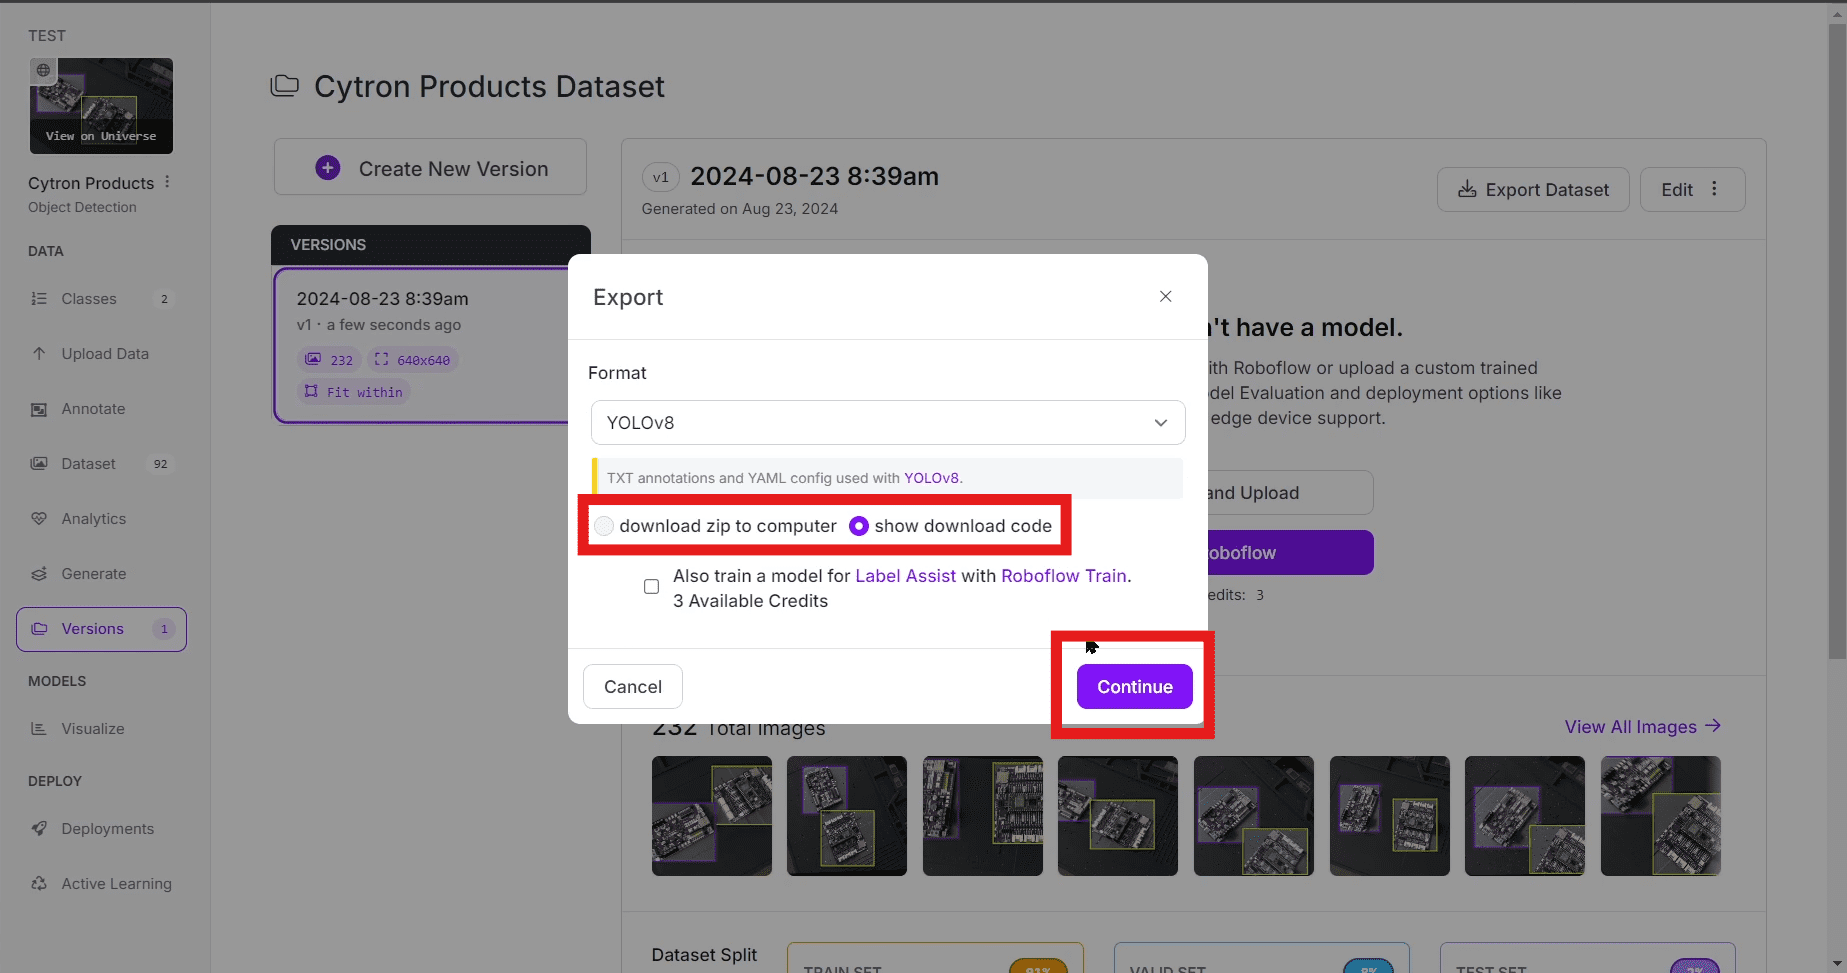
- Export Dataset: Once labelled, export the dataset in YOLOV8 format. Show download code and copy the code (for training in google collab). Also download the dataset to your computer to be used during the conversion process.
Continue to the next section for dataset training using google collab.