 International
 Singapore
 Malaysia
 Thailand
 Vietnam
Your shopping cart is empty!

Bonus Project: Home Automation Project
- Irsyad Aiman
- 26 Jul 2024
- Tutorial
- Beginner
- 91
Overview
Utilize all the projects that incorporate all the previous projects we have using ESP8266 through Blynk.
Required components
In this tutorial, these are required components:
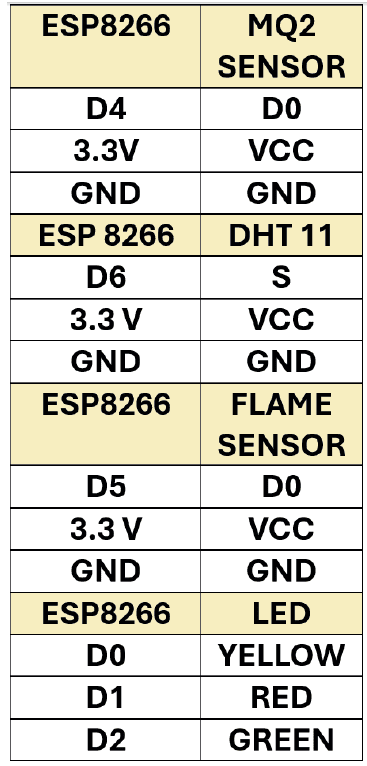
- NodeMCU ESP8266
- Breadboard
- MQ2 Sensor
- Flame Sensor
- 2 x LED
- 3 x Resistor
- 9 x Male-to-Female Jumper
- 2 x Female-to-Female Jumper
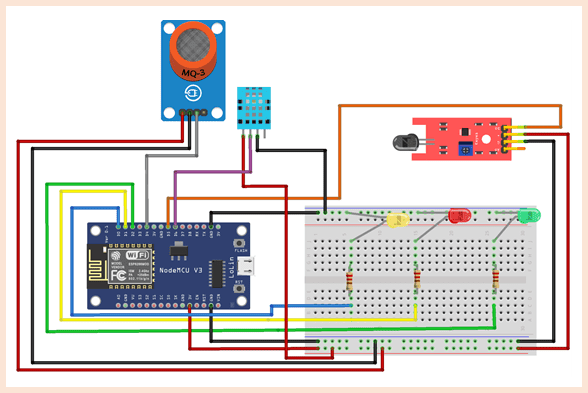
Circuit Diagram
Blynk setup
1. Create a New Template.
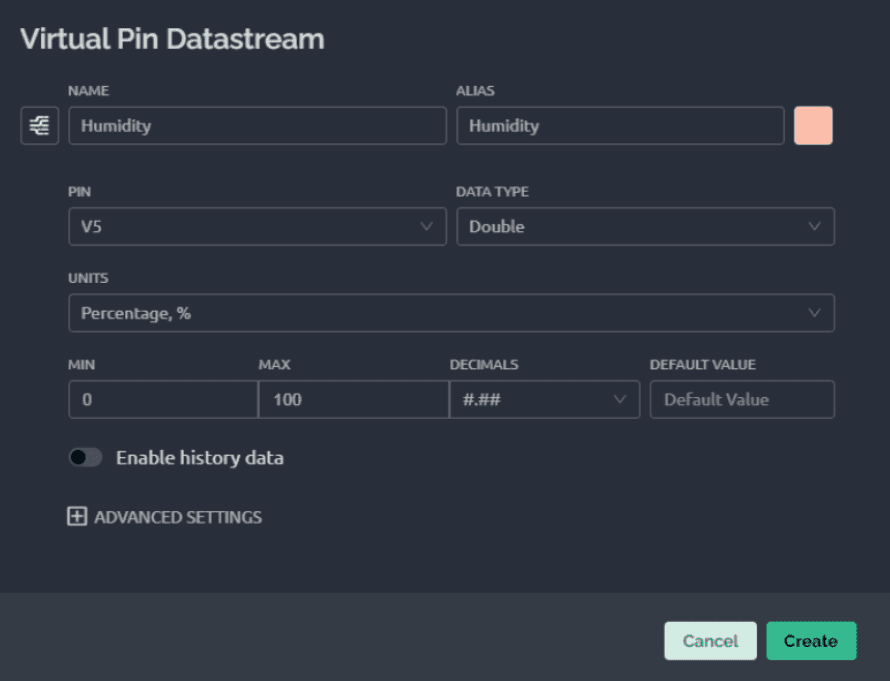
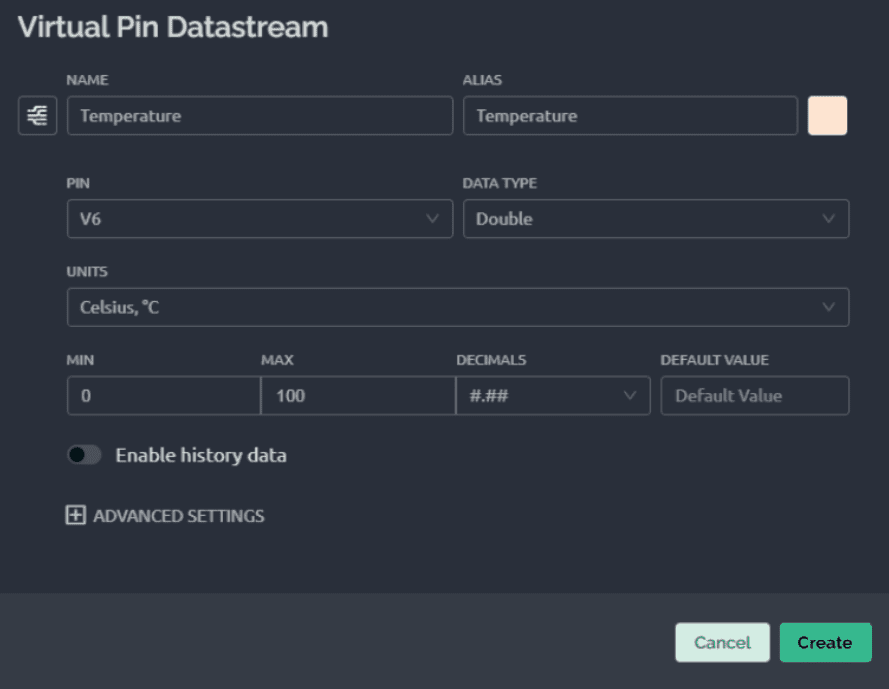
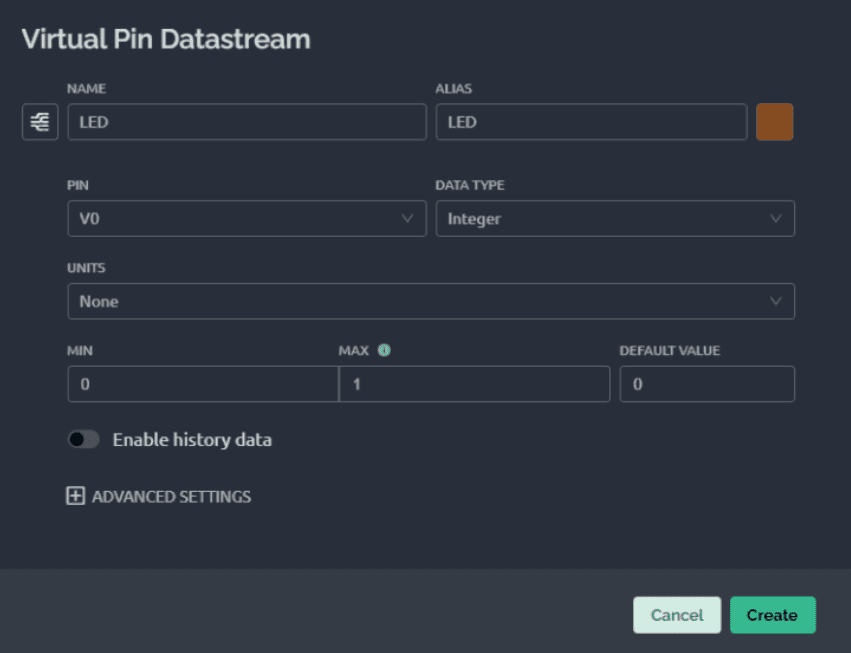
2. Create 5 datastreams for smoke, flame, temperature, humidity, and home LED.
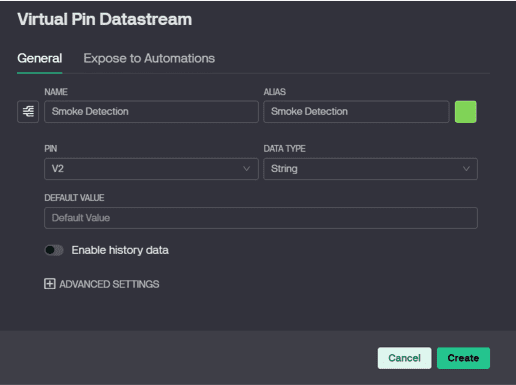
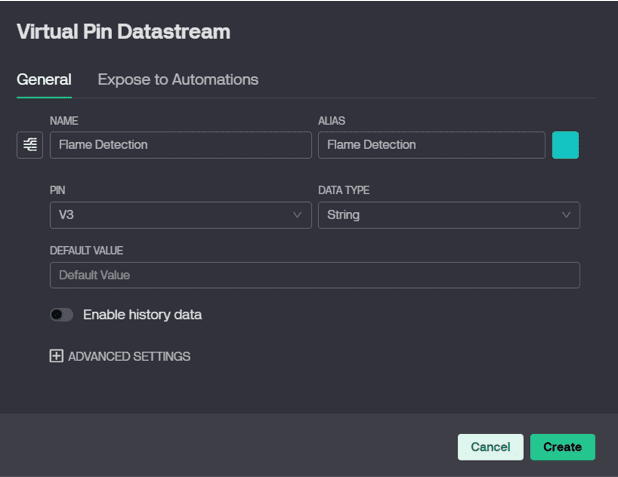
3. For Web Dashboard, create:
- 2 Label widget for Smoke and Flame
- 2 Gauge widget for Temperature and Humidity
- 1 Switch widget for Home LED
4. Create a new device and take note of the Blynk credentials.
Code
1. Copy and paste the code below into Arduino IDE software.
2. Similar to the previous project, replace the Blynk and WiFi credentials.
Hardware Components
") New
NewCytron NodeMCU Starter Kit (Blynk)
$16.25 $16.25
x 1 unit(s)