 International
 Singapore
 Malaysia
 Thailand
 Vietnam
Your shopping cart is empty!

Raspberry Pi AI Kit: Human Notification with Computer Vision
- Asri Ruslan
- 10 Jul 2024
- Tutorial
- Intermediate
- 724
In this tutorial, we will create a Human Notification System using the Raspberry Pi AI Kit with the Cytron Maker Pi Pico to indicate the detection of a person based on data received from a server. The Maker Pi Pico features a built-in SD card reader for storing audio, as well as a 3.5mm audio jack that allows users to interface the Raspberry Pi Pico W with external speakers.
Additionally, it has a built-in RGB LED on the board to indicate detection. We will utilize the newly launched Raspberry Pi AI Kit to enhance our computer vision capabilities. This kit, featuring the Hailo-8L AI accelerator module, allows for high-performance, low-latency AI inferencing on a Raspberry Pi 5.
We will be using three different pieces of code to achieve this:
- Client code (CircuitPython) for connecting to a Wi-Fi network, receiving data from a server, and controlling the RGB LED strip.
- Server code (Python) for sending data to the client.
- Background processing script (Bash) for monitoring object detection results and updating the server with relevant data.
Component List
To set up the notification system described in this tutorial, you will need the following components:
- Raspberry Pi 5
- The main component to run the server code and Raspberry Pi AI Kit.
- Raspberry Pi AI Kit
- Required for running the YOLO object detection model efficiently. This kit features the Hailo-8L AI accelerator module, allowing for high-performance, low-latency AI inferencing on a Raspberry Pi 5.
- Raspberry Pi Camera Module 3 with Cable
- Maker Pi Pico Base with Raspberry Pi Pico W
- Microcontroller to run the client code and manage the audio storage, speaker interfacing, and RGB LED. The Cytron Maker Pi Pico simplifies digital making by adding extra features to the Raspberry Pi Pico W, such as a built-in SD card reader, a 3.5mm audio jack for external speaker interfacing, and built-in RGB LEDs.
- Speaker with 3.5mm Audio Jack
- For audio notifications.
- SD Card
- For audio storage.
- NVMe SSD
- Optional for faster boot and operation. Requires an M.2 to USB adapter for USB boot or boot from SD Card.
Additional Tools and Accessories
- 27-Watt PD Power Supply for Raspberry Pi 5: Ensure it meets the power requirements of the Raspberry Pi 5.
- Internet Connection: For communication between Raspberry Pi 5 & Pico W via Wi-Fi connection.
- Heatsinks or Cooling Fan: To keep the Raspberry Pi cool during prolonged operation, especially when using the AI Kit.
- Case for Raspberry Pi: To protect your Raspberry Pi and components.
Clone Repository
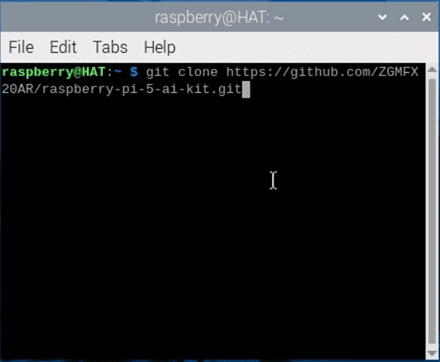
- Open the terminal and copy and paste this command:
git clone https://github.com/ZGMFX20AR/raspberry-pi-5-ai-kit.git
Setting Up the Client Side
Note: This section requires the Circuitpython library, which can be downloaded here.
- Create an audio file by following this tutorial.
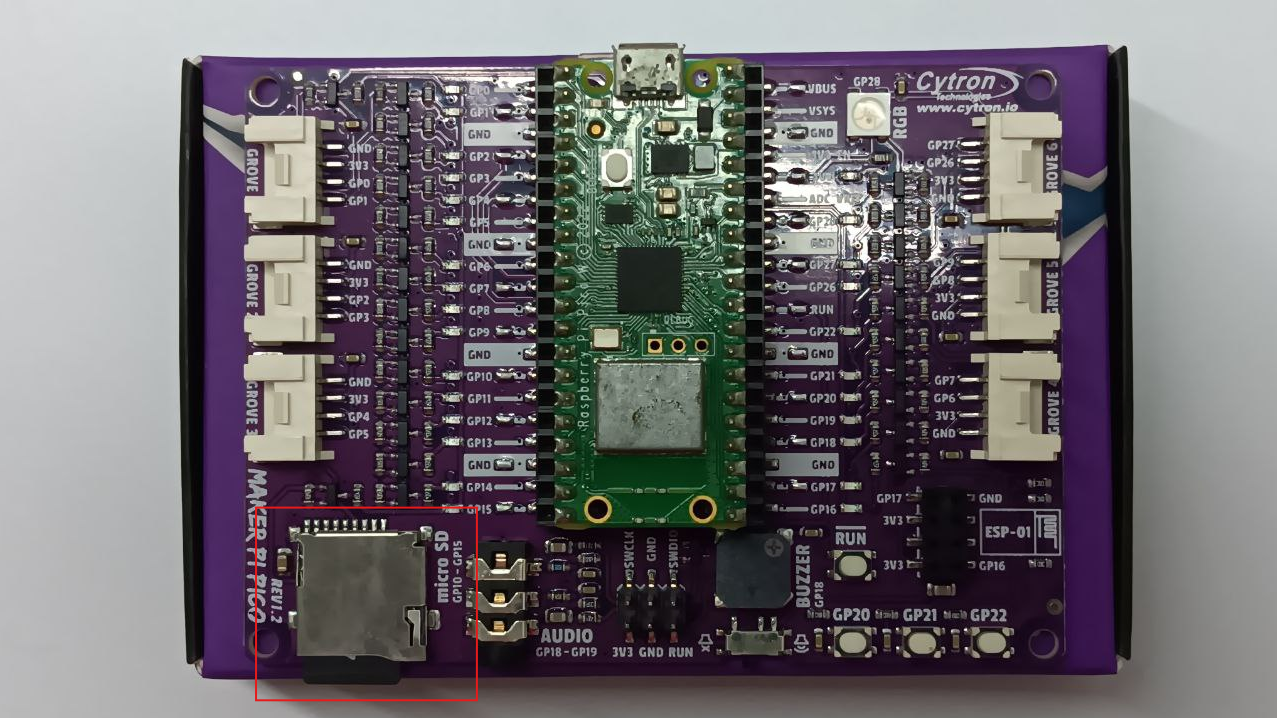
- Insert an SD card that contains the audio file to the Maker Pi Pico SD Card Slot.
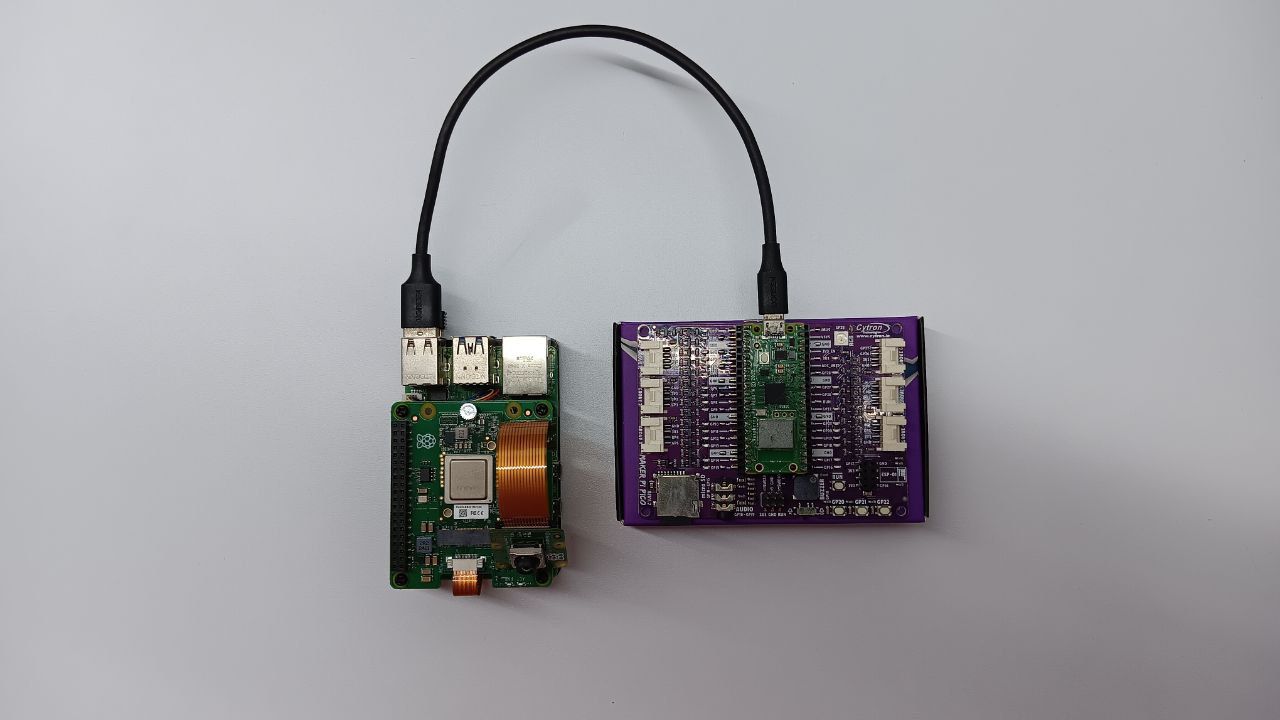
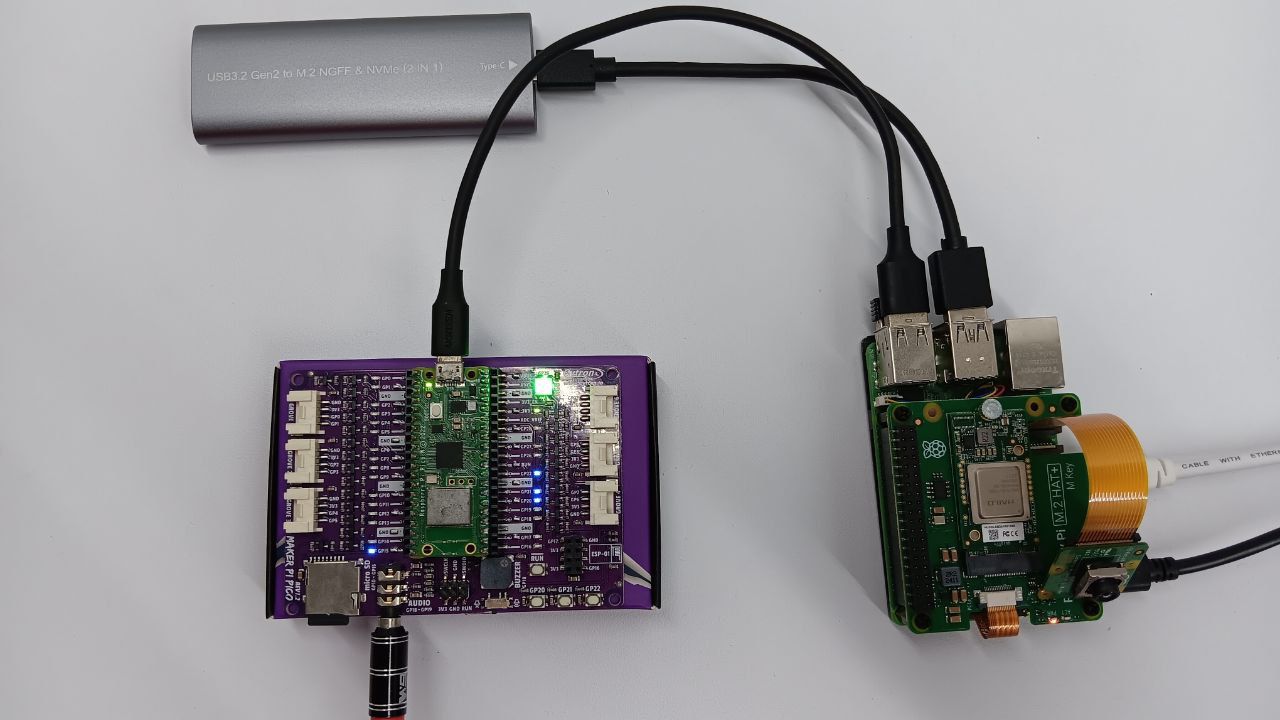
- Connect your Raspberry Pi Pico W to your Raspberry Pi 5.
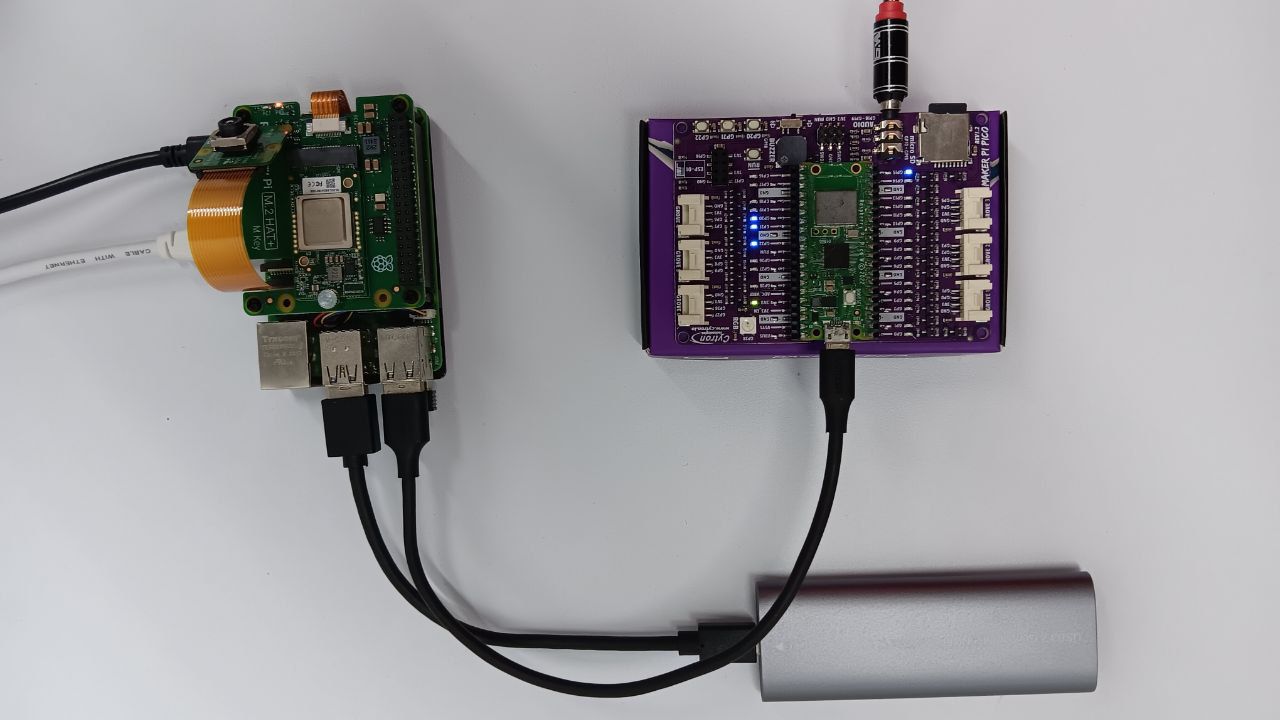
- Final hardware assembly.
- Go to the cloned folder (raspberry-pi-5-ai-kit/PersonDetection/code.py) and copy the code.py into the Raspberry Pi Pico W.
- Create an empty folder inside the Raspberry Pi Pico W and name it "sd".
- Open the copied code.py using Thonny IDE. Replace the ssid, password, and server_ip, then save.

Setting Up the Server Side
Note: This section requires pre-installed Raspberry Pi AI Kit hardware & software components, which can be found here.
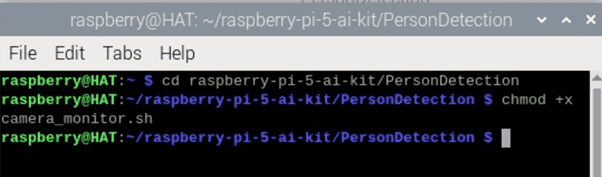
- Open the terminal and copy and paste this command to go to the directory:
cd raspberry-pi-5-ai-kit/PersonDetection
- Make the script executable using this command:
chmod +x camera_monitor.sh
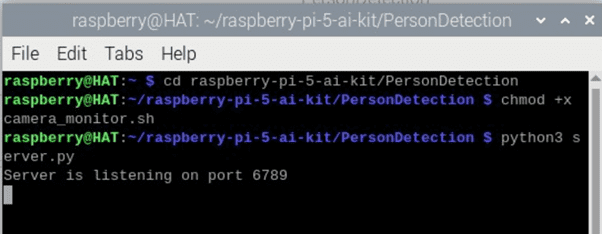
- Copy and paste this command to run the server.py:
python3 server.py
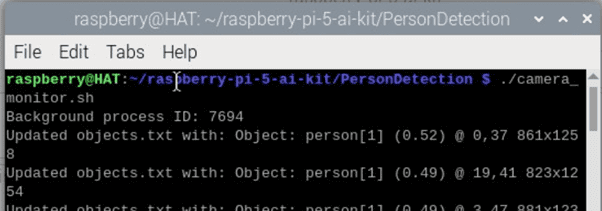
Running All Components
- With the server running, open another terminal and run this command. A window with the camera view will appear:
./camera_monitor.sh

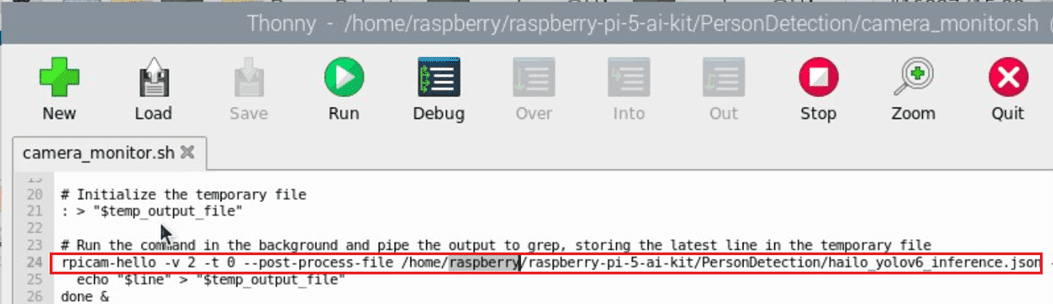
Note: If the camera view window does not appear, ensure the directory of the .json file matches your file directory. You may need to edit the camera_monitor.sh script.
- Open Thonny with the Raspberry Pi Pico W and run the code.py.
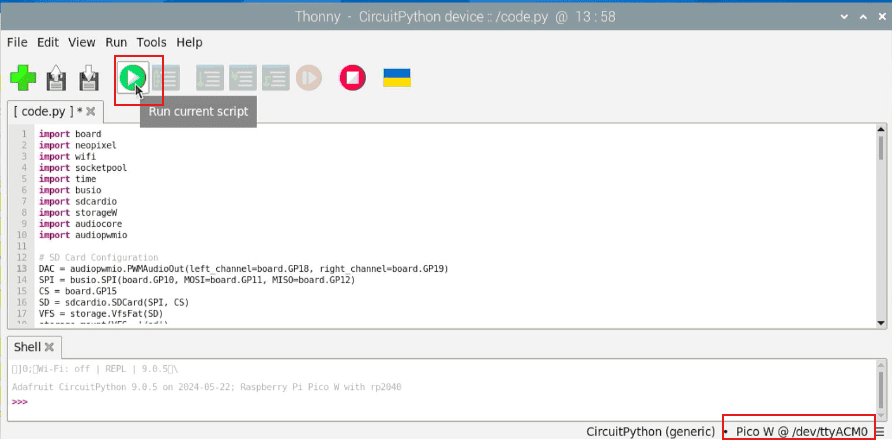
- The onboard RGB LED will light up green when no person is detected, and will turn red and play an audio notification through the speaker when a person is detected.
Conclusion
By following these steps and assembling the specified components, you will not only create an effective Human Notification System using computer vision and AI capabilities but also gain valuable hands-on experience with artificial intelligence. The Raspberry Pi AI Kit and Cytron Maker Pi Pico make this setup an excellent introduction to the world of AI, especially computer vision AI.
The Maker Pi Pico simplifies digital making by adding extra features to the Raspberry Pi Pico W, such as a built-in SD card reader, a 3.5mm audio jack for external speaker interfacing, and built-in RGB LEDs. This project will help you understand how to integrate AI for real-time object detection and control physical hardware like the RGB LED strip, providing a solid foundation for exploring more advanced AI applications in the future.
Hardware Components

6W Stereo USB Powered 3.5mm Jack Speaker-Black
$9.18 $9.18
x 1 unit(s)

USB2.0 Cytron microSD Card Reader/Writer
$1.00 $1.00
x 1 unit(s)

Raspberry Pi Approved MakerDisk microSD Card wi...
$11.00++ $11.00
x 1 unit(s)
 Best Seller
Maker Pi Pico & Kits: Simplifying Raspberry...
$9.00++ $9.00
x 1 unit(s)

Raspberry Pi Camera Module 3 - 12MP with Auto F...
$27.50++ $27.50
x 1 unit(s)
-268x268.jpg "USB 3.1 to M.2 Dual Protocol (NVMe/NGFF) B+M Key with USB-C Cable")
USB 3.1 to M.2 Dual Protocol (NVMe/NGFF) B+M Ke...
$15.00 $15.00
x 1 unit(s)
 Best Seller
Raspberry Pi 5 Single Board Computer
$55.00++ $55.00
x 1 unit(s)
") Best Seller
Best SellerNVMe 2242 M-Key MakerDisk SSD (Preloaded with R...
$36.25++ $36.25
x 1 unit(s)
 FPC for Raspberry Pi 5")
22-way to 15-way CSI (Camera) FPC for Raspberry...
$1.38++ $1.38
x 1 unit(s)
 Out Of Stock
Raspberry Pi AI Kit-13 TOPS AI Power for Raspbe...
$77.00++ $77.00
x 1 unit(s)