 International
 Singapore
 Malaysia
 Thailand
 Vietnam
Your shopping cart is empty!

DC Motor
- Hao Zhen Goh
- 05 Jun 2024
- Tutorial
- Beginner
- 93
This guide is about running your DC (direct current) Motor by using the 4 Motor Terminals on the MOTION:BIT Pro with example connections and advises to use the MOTION:BIT MakeCode Extension.
Intro
DC motors can spin in both directions either in clockwise or counterclockwise.
To change the spinning direction, you can either swap the RED and Black wire connections to the motor terminals Or Change the setting in your code.
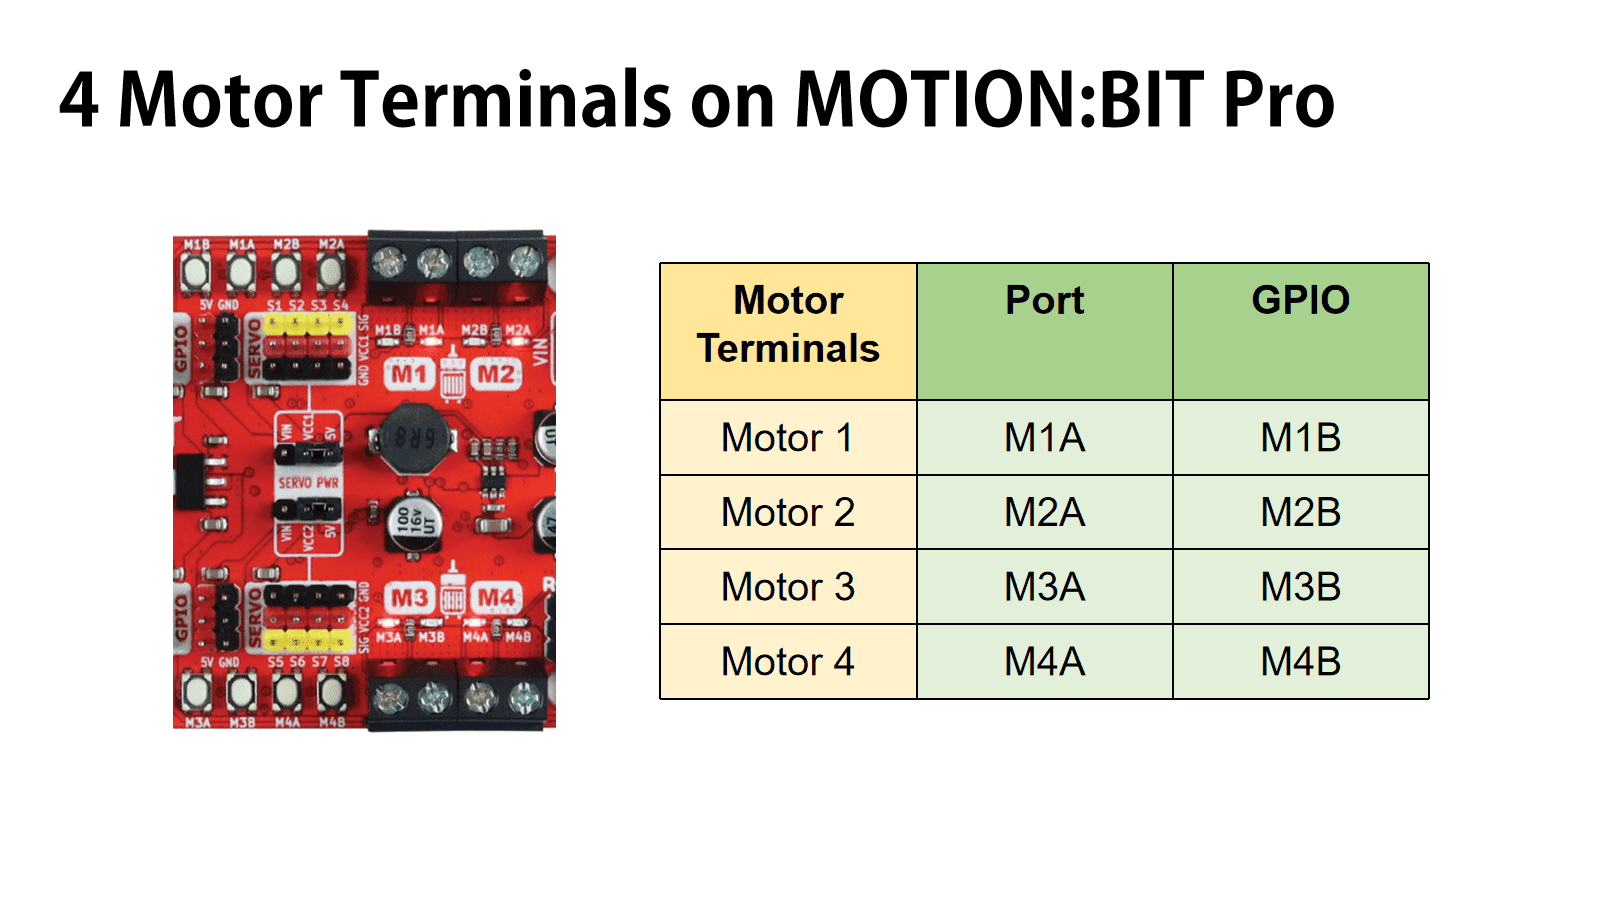
Motor Terminals on MOTION:BIT Pro
There are 4 Motor Terminals on MOTION:BIT PCB.
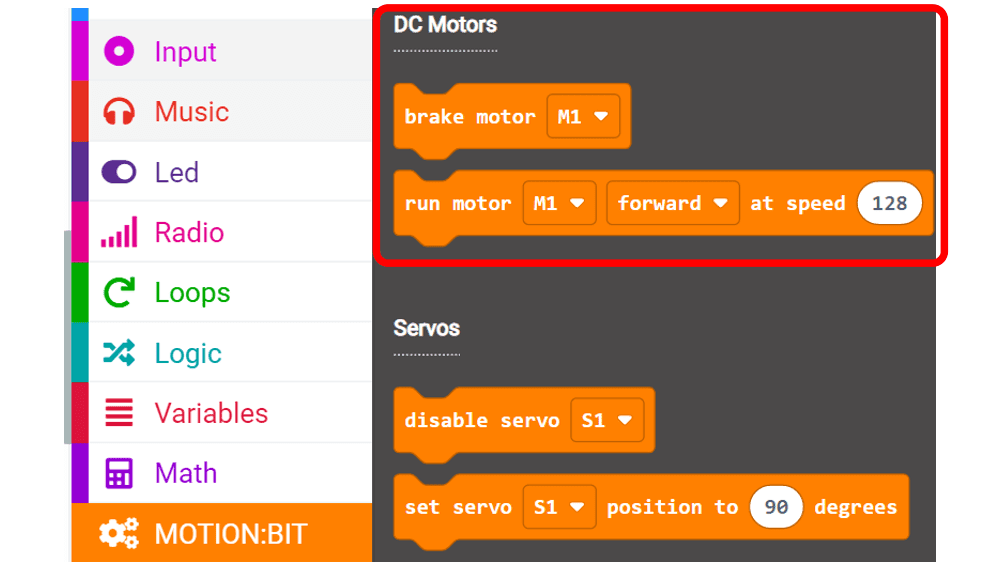
MakeCode MOTION:BIT "RUN" & "BRAKE" Motor Block and Hardware Setup
So in the MakeCode Editor, you may set the motors either to “RUN” or “BRAKE”.
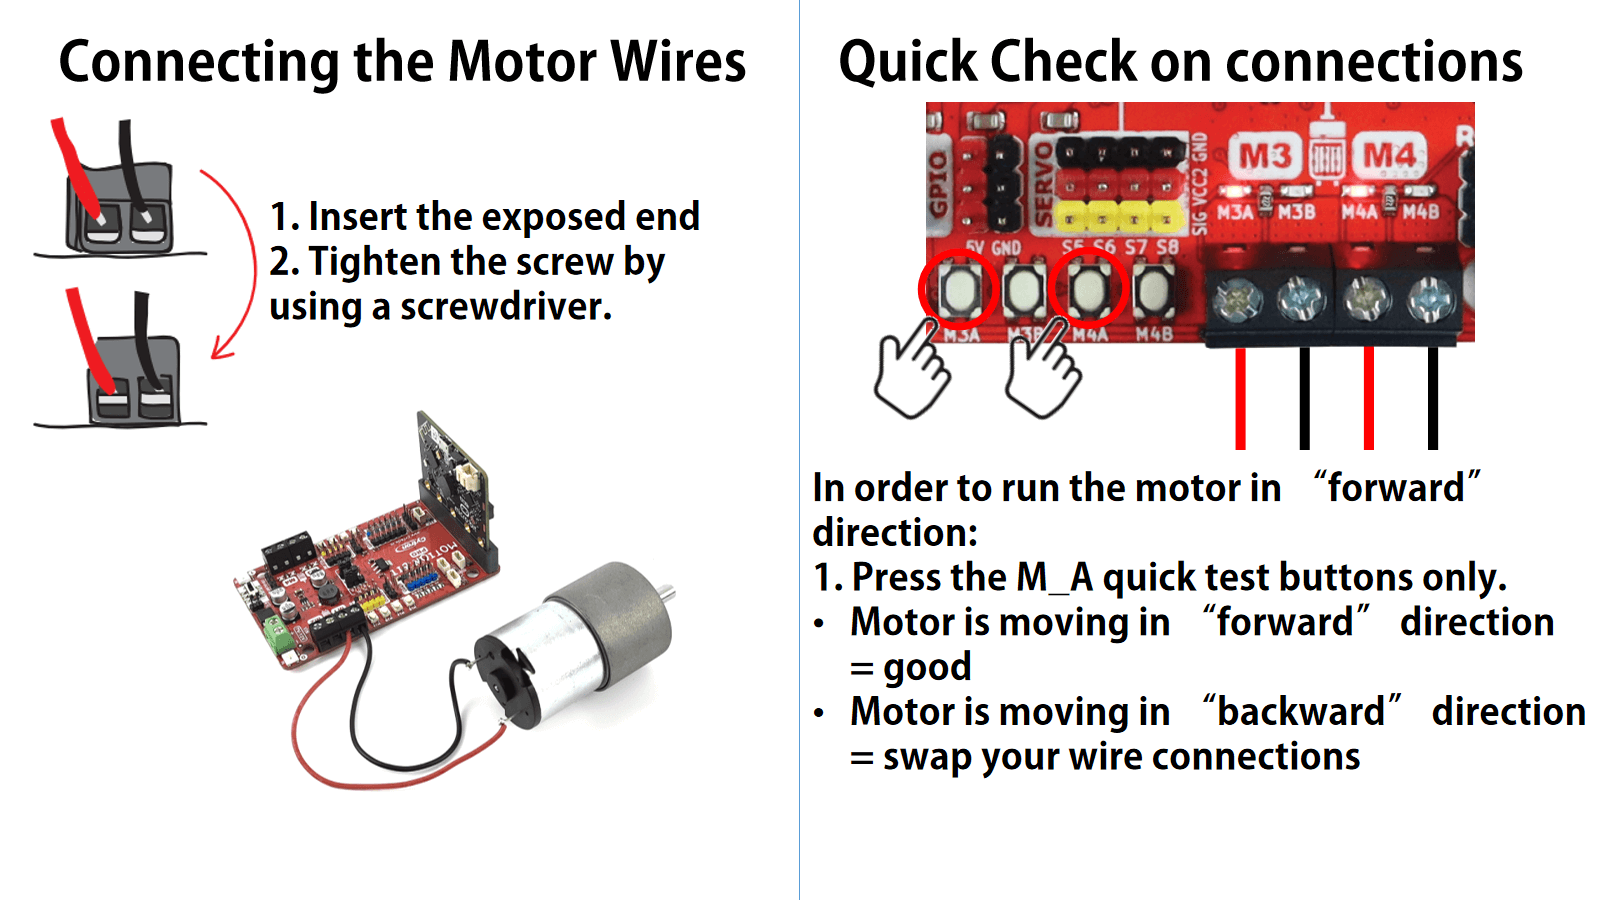
In order to program your MOTION:BIT Robot Car to move “forward”, you will need to connect the DC Motor’s wire correctly. Here is an example of DC motor connections using TT motors (DC motor).
Note: Quick check on connections
- Press the motor quick test buttons (labeled M_A or M_B)
- Motor is moving = Good
- Motor is not moving = Bad
- Check the connections again, the terminals might be touching the insulated layer of the wire instead of the exposed part of the wire.
Note: Run Motor in "FORWARD" directions
- Press M_A Quick Test Button to check the spinning direction of the motor.
Hope you are having fun building projects with MOTION:BIT.
You may continue to read through the tutorials on other key features of this board or trying out some of the project guides.
Hardware Components
 New
NewMOTION:BIT Pro - 12V Robotics Expansion Board f...
$39.75 $39.75
x 1 unit(s)