 International
 Singapore
 Malaysia
 Thailand
 Vietnam
Your shopping cart is empty!

DC Motor
- Hao Zhen Goh
- 08 Aug 2024
- Tutorial
- Beginner
- 190
This guide will show you how to power up the dc motor through your MOTION 2350 Pro.
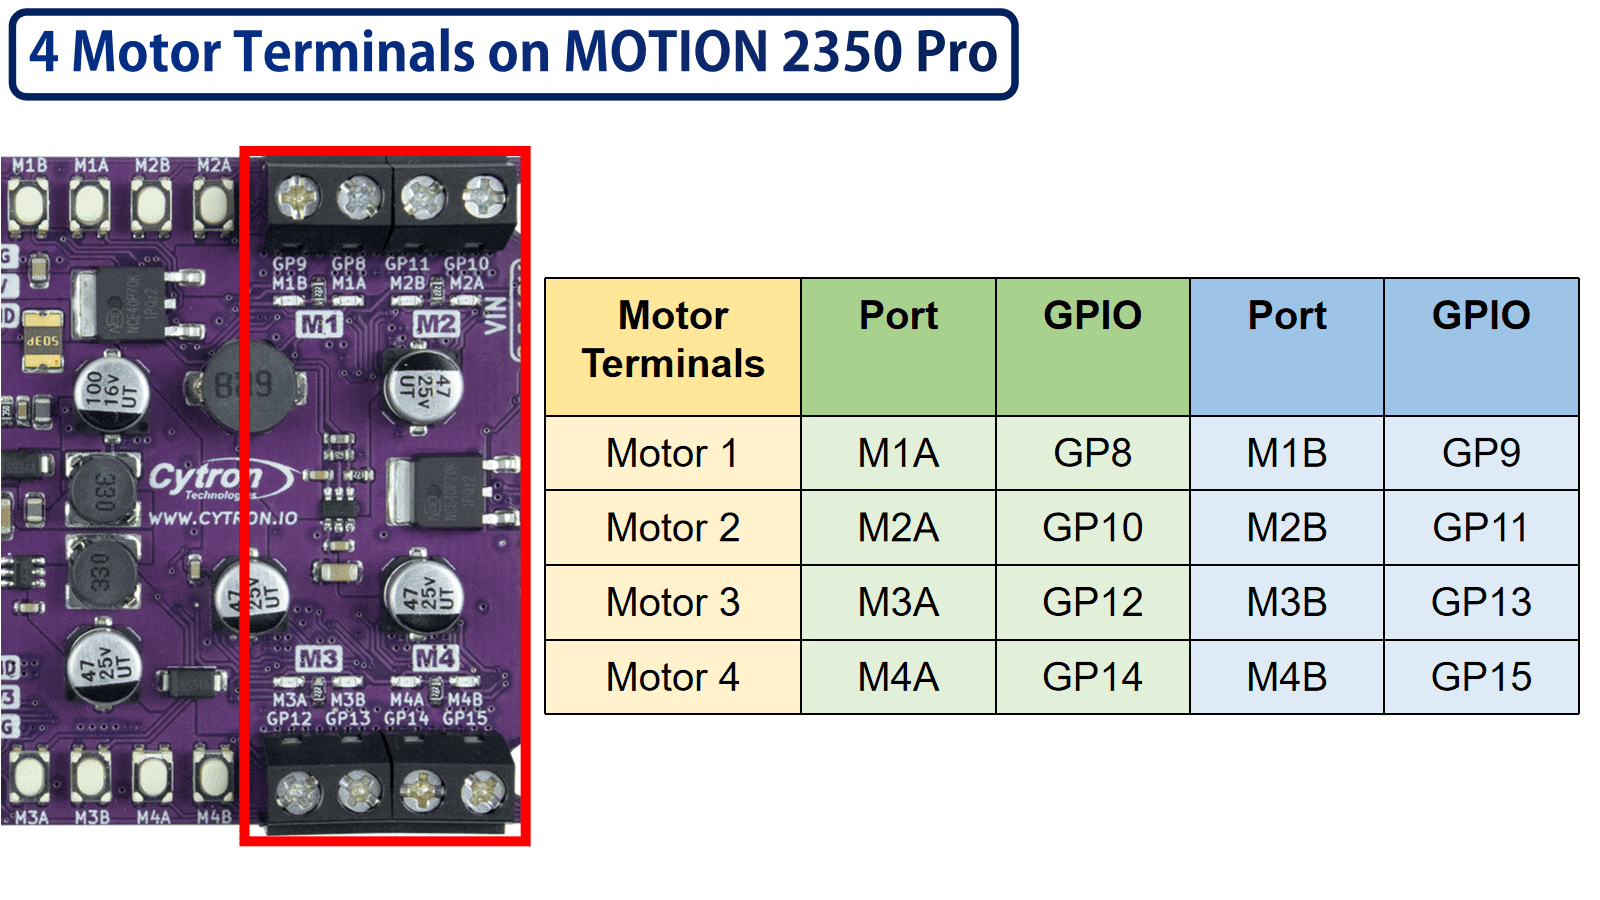
The figure below shows the GPIO for each of the motor terminals on MOTION 2350 Pro.
Select the Suitable Power Source
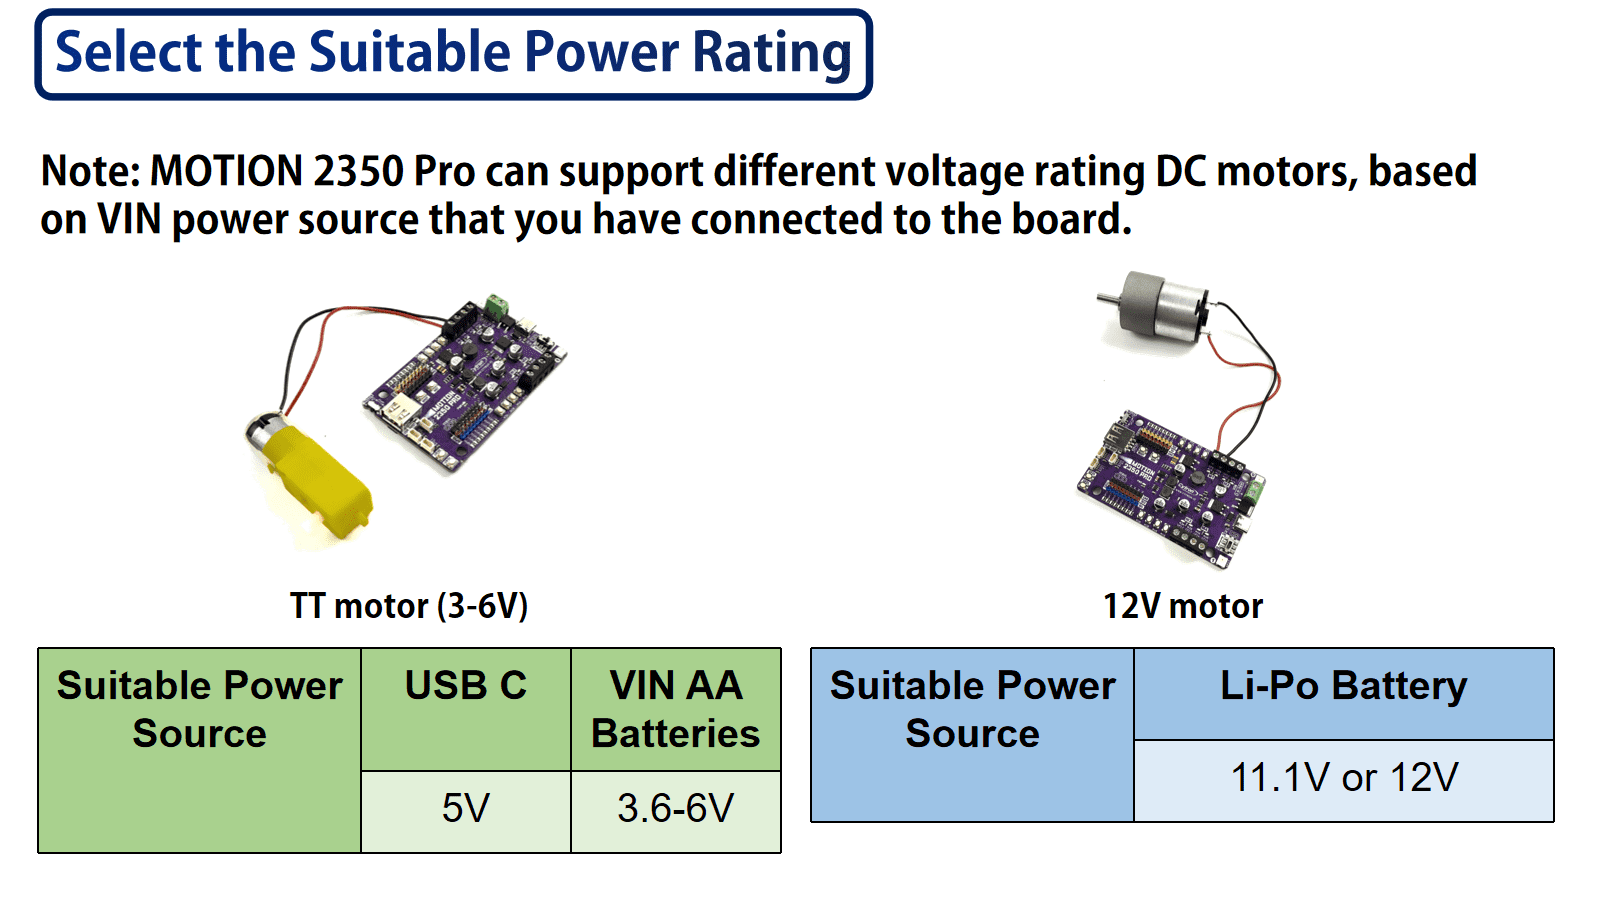
The volatge supply at the 2 motor channels is the same as the voltage rating of the power source connected to the board.
Hence, MOTION 2350 Pro can support a range of DC motors with different voltage rating, ranging from 3.6V to 16V.
The following figure shows the example connection of 2 DC motors with different voltage rating with their respective power source stated
- TT motor (3-6V)
- 12V DC motor
Connection and Coding
1. Open your editor software (for example Thonny). Select the code.py file in your drive.
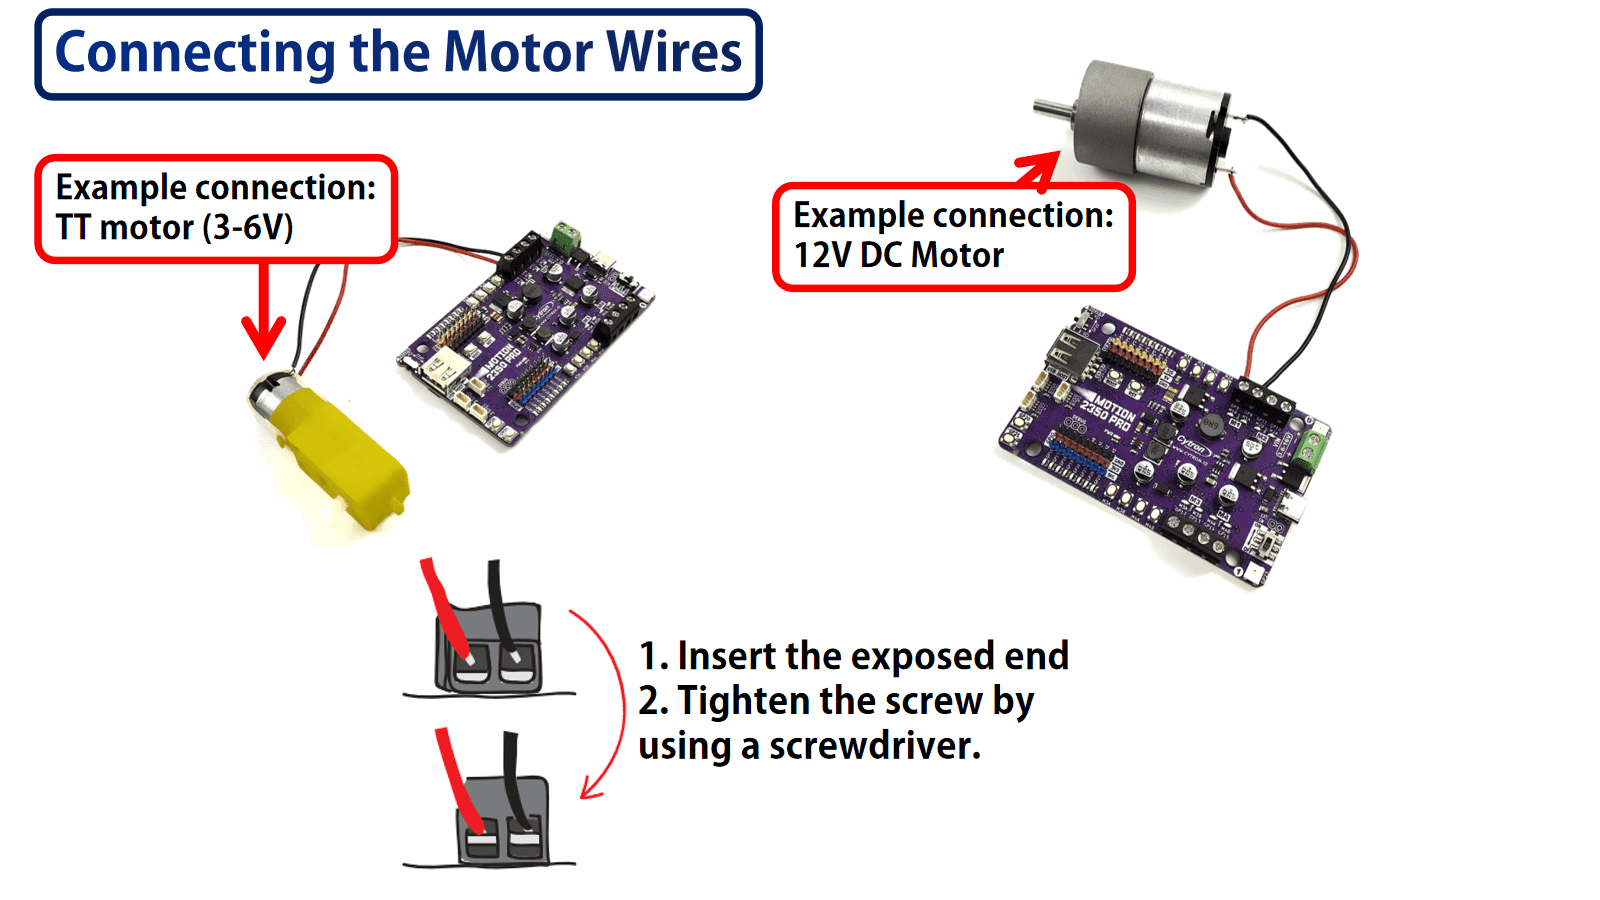
2. Connect 2 DC motors to both DC Motor Terminals (Black Colour).
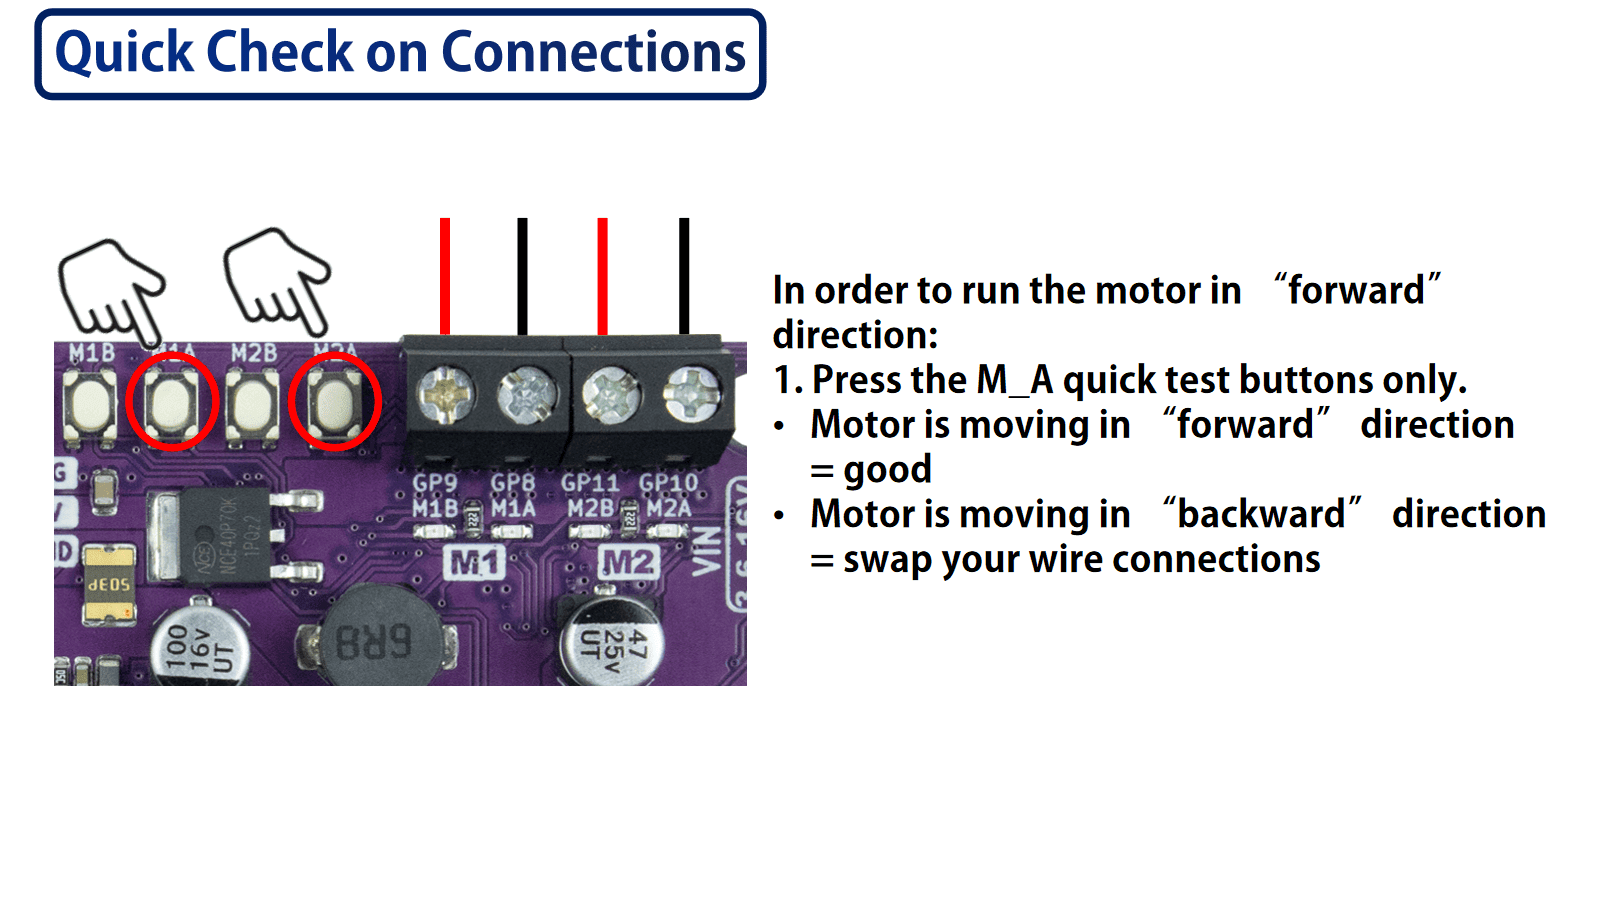
Note: You can always test the connections of the DC motor wires whether the wires are properly connected to the terminal block by pressing the motor test buttons labeled M1A, M1B, M2A or M2B while your MOTION 2350 Pro is powered up and switched on.
In order to let the motor run in forward direction, press the “MXA” button only. If you wish to change the direction of the rotation of the wheel, you can loosen the wires and swap the wires connected to the terminals.
3. Copy and paste the following code to your editor.
4. Flash the codes to your MOTION 2350 Pro. And your CIRCUITPY drive should look like this :
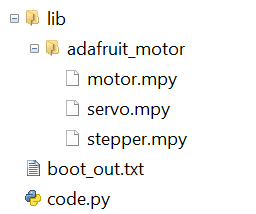
Library file(s) required:
adafruit_motor (file) : motor.mpy, servo.mpy, stepper.mpy
If you don't have this file in your computer, download the lib bundle here and search for this file inside the "lib" folder.
Hardware Components

TT Motor with 40cm Wires and Wheel Kit
$1.75 $1.75
x 1 unit(s)
 New
Backorder Only
New
Backorder OnlyMOTION 2350 Pro - Advanced Robotics Controller ...
$24.90 $24.90
x 1 unit(s)